Feature Availability: ALL PLANS
Store branding is a strategy for developing a strong perception of your store in your customers' eyes. It's the intentional actions you take to arouse favorable emotions and encourage clients to view your business in a particular way. A brand is typically an identity—the tale you tell clients to engage them.
Why is it important? It seeks to ensure that retail brands make a lasting impression on customers, inviting them back often. It's significant because, in addition to making a lasting impression on customers, it lets them know what to anticipate from your retail brand.
Skill Level: Beginner | Advanced | Expert
How long does it take to do? 15 Minutes
Requirements:
1. Store Logo & Favicon
Upload Manually (or generate with AI)
File Type:
.jpg,.png, or.webpNo size limit specified in the screenshot, but smaller square formats (1:1 ratio) are ideal.
Recommended Logo Size: 500 × 500 px
Recommended Favicon Size: 32 × 32 px or 64 × 64 px
2. Store Background
Max Size: 10 MB
Min Resolution: 5 px × 5 px (any valid image)
File Type:
.jpg,.png,.webp
3. Social Media Share Image
Max Size: 10 MB
Min Resolution: 1200 px × 628 px
File Type:
.jpg,.png,.webp(This image is shown when your store link is shared on social media.)
4. Cover Photo (Default – Desktop)
Max Size: 10 MB
Min Resolution: 820 px × 312 px
Recommended Max Resolution: 1600 × 600 px
File Type:
.jpg,.png,.webp
5. Cover Photo (Desktop – Wide)
Max Size: 10 MB
Min Resolution: 1440 px × 600 px
Recommended Max Resolution: 1920 × 600 px
File Type:
.jpg,.png,.webp
6. Cover Photo (Mobile)
Max Size: 10 MB
Min Resolution: 640 px × 360 px
File Type:
.jpg,.png,.webp
Summary
Go to Page Builder, then select Design Settings.
Select Store Branding.
Complete the Fields.
Save.
Steps to update Logo, Favicon, Cover Photo, Background and Social Media Share Image
1. Go to Page Builder, then select Design Settings
2. Select Store Branding
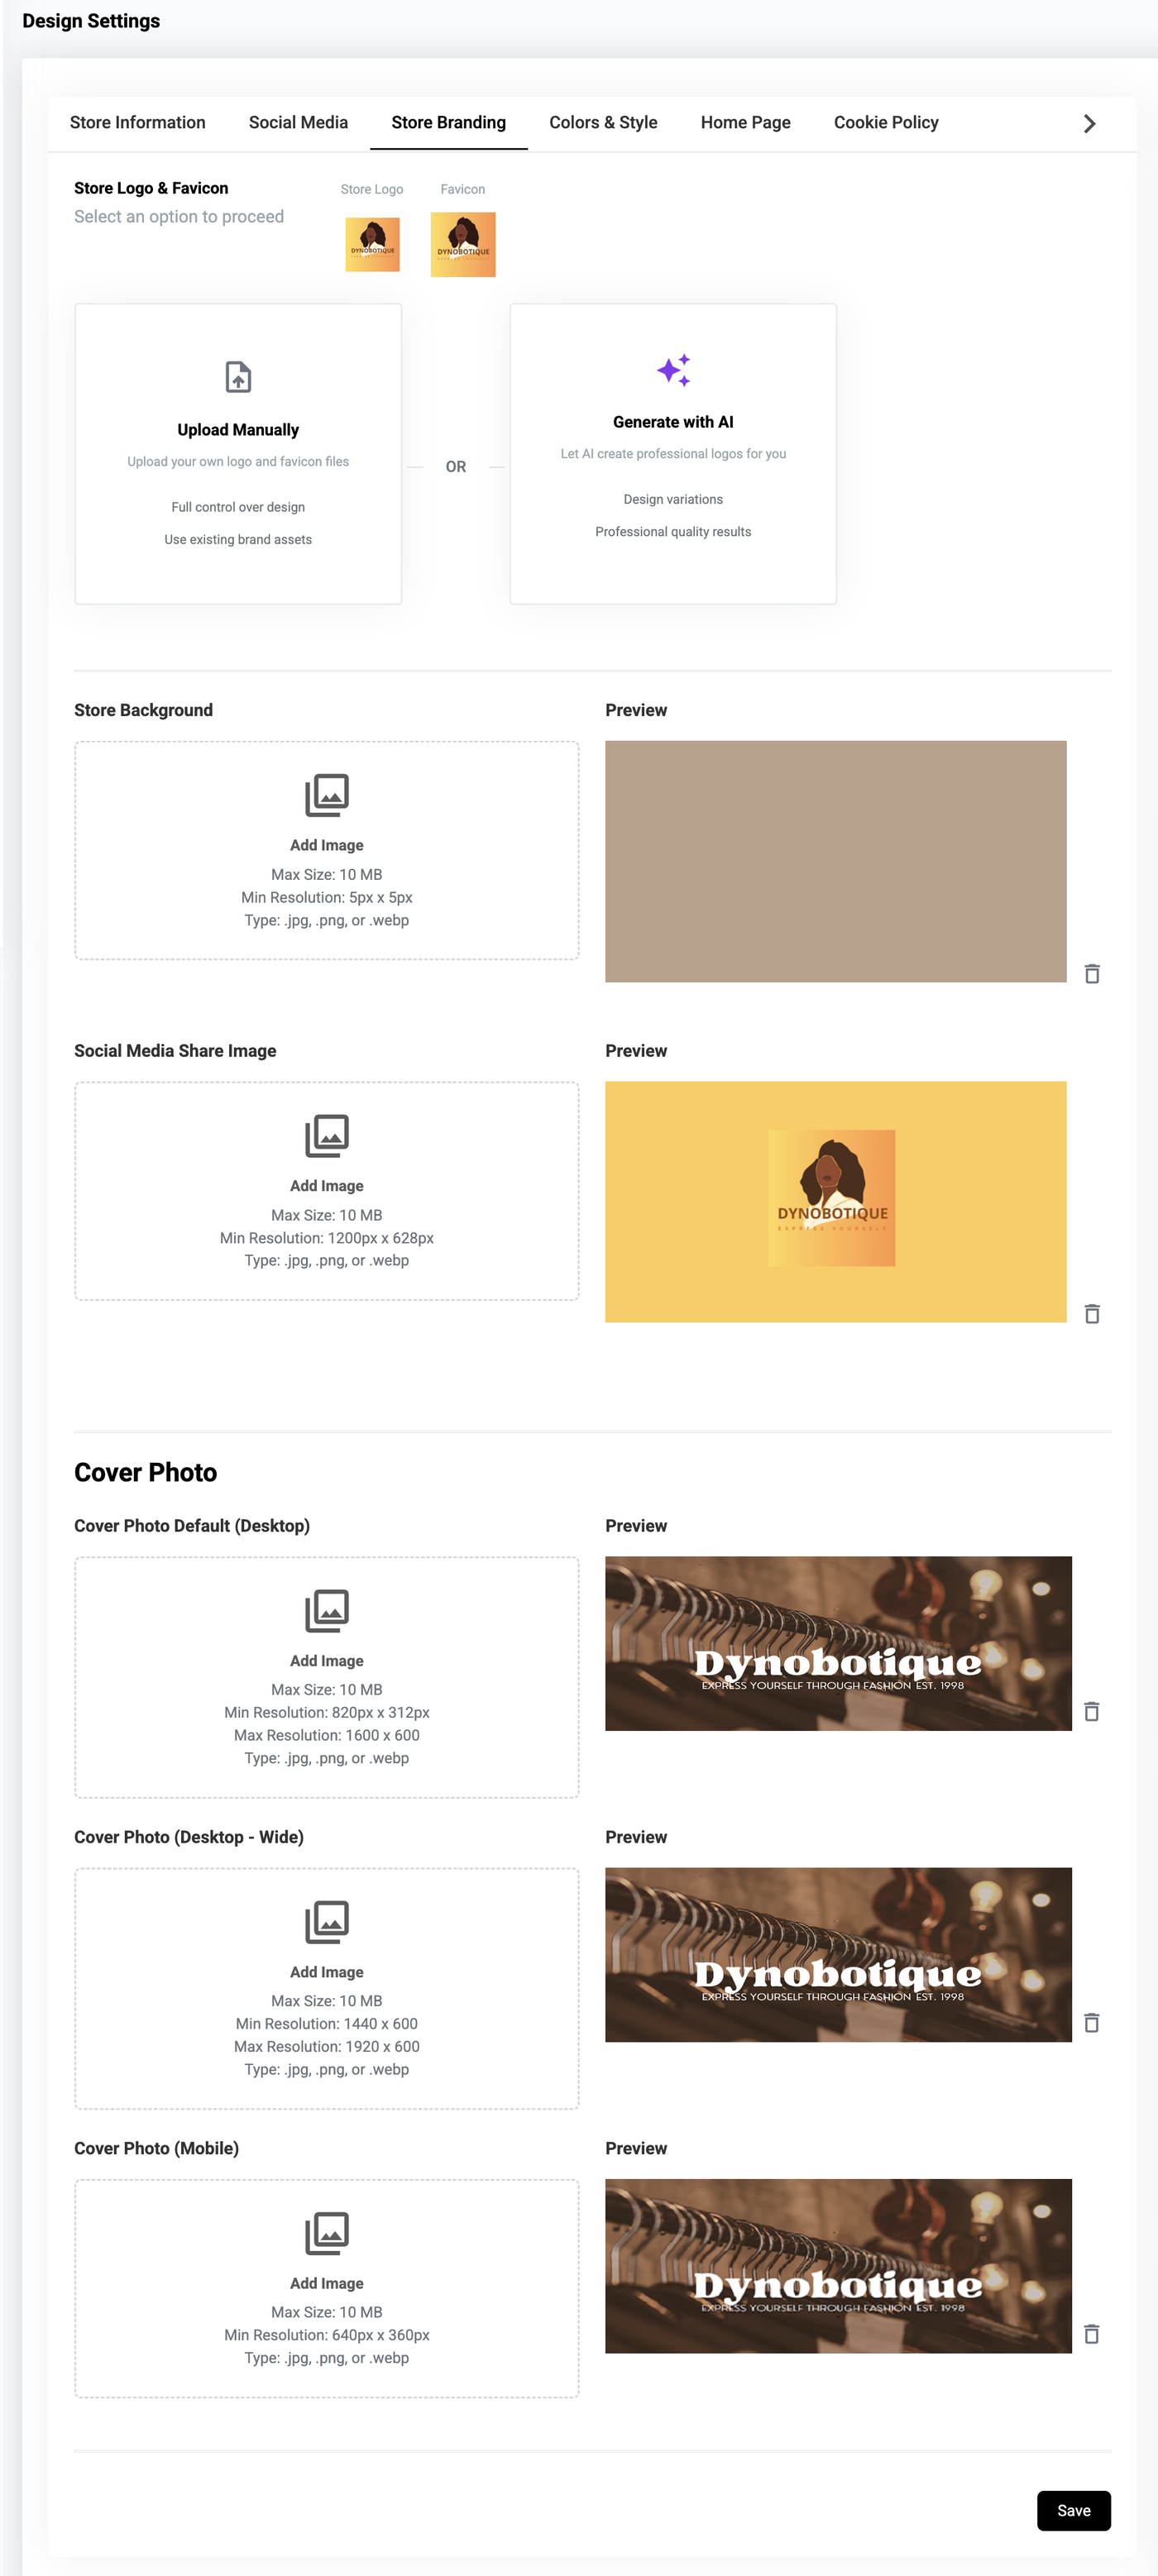
3. Complete the Fields
Logo - brand logo
Logo Style - shape of your logo
Favicon - website icon
Cover Photo - banner photo
Background - background image / color
Social Media Share Image - thumbnail showed when sharing website on Social Media
3.1 Adding Logo
Click Drop files here or click to upload (or generate with AI)
Select the Image
Click Open
3.2 Adding Favicon
What is a favicon? A favicon is a small icon or collection of icons associated with a website, web page, or web application. It’s displayed within the browser tabs and bookmarks bar. See example below.
Note: Your Store Logo is the same as your favicon.Click Drop files here or click to upload (or generate with AI)
Select the Image
Click Open
3.3 Store Background
You may add a background photo to your preference.
Upload the image here.
Click Open
3.4 Social Media Share Image
Upload the image here.
Click Open
3.5 Cover Photo
Note: By default, the cover photo is the same for all locations. If you want a different cover photo for each location, disable the "Display Across All Store Locations" option. Check here for instructions on updating the cover photo for each location.
Click Drop files here or click to upload
Select the Image
Click Open
4. Save
For every section that you edit, make sure to click Save to update the changes.
Result: You have successfully updated your Logo, Favicon, Cover Photo, Background color and Social Media Share Image.
Need more help?
For more information and assistance, please send an email to support@prosperna.com.