Feature Availability: ALL PLANS
Since our inception in 2020, thousands of Philippine businesses have trusted Prosperna to help get their business online. From restos & cafes, to health & beauty, and fashion & apparel brands, as well as gadgets and almost anything you can think of.
Thank you for choosing Prosperna as your technology partner!
We’ve all seen the power of eCommerce and how consumers have flocked from in-store purchases to online shopping. Digitizing your business is essential to all brands for reaching new markets and simplifying operations.
Our goal is to help you create your own online store, start accepting payments and manage shipping within just a few minutes and without requiring any technical knowledge or breaking the bank.
Why is it important? This setup guide will help you navigate everything you need to get started selling with Prosperna. Maximize the capacity of online selling by getting all the features activated and customized to fit your business needs.
Skill Level: Beginner | Advanced | Expert
How long does it take to do? 10 Minutes
Requirements:
Account Credentials
Store Information
Compliance Documents
Summary
Create an Account
Update Store Branding
Update Store Location
Upload a Product
Set Up Payment / Activate myPay
Set Up Shipping
What's next?
Steps to complete the Setup Guide
Create an Account
1. Go to the Registration Page
On mobile or desktop, open a browser (we recommend using a desktop for easier navigation).
Copy and paste this link into the address bar:
👉 https://p1.prosperna.ph/account/register
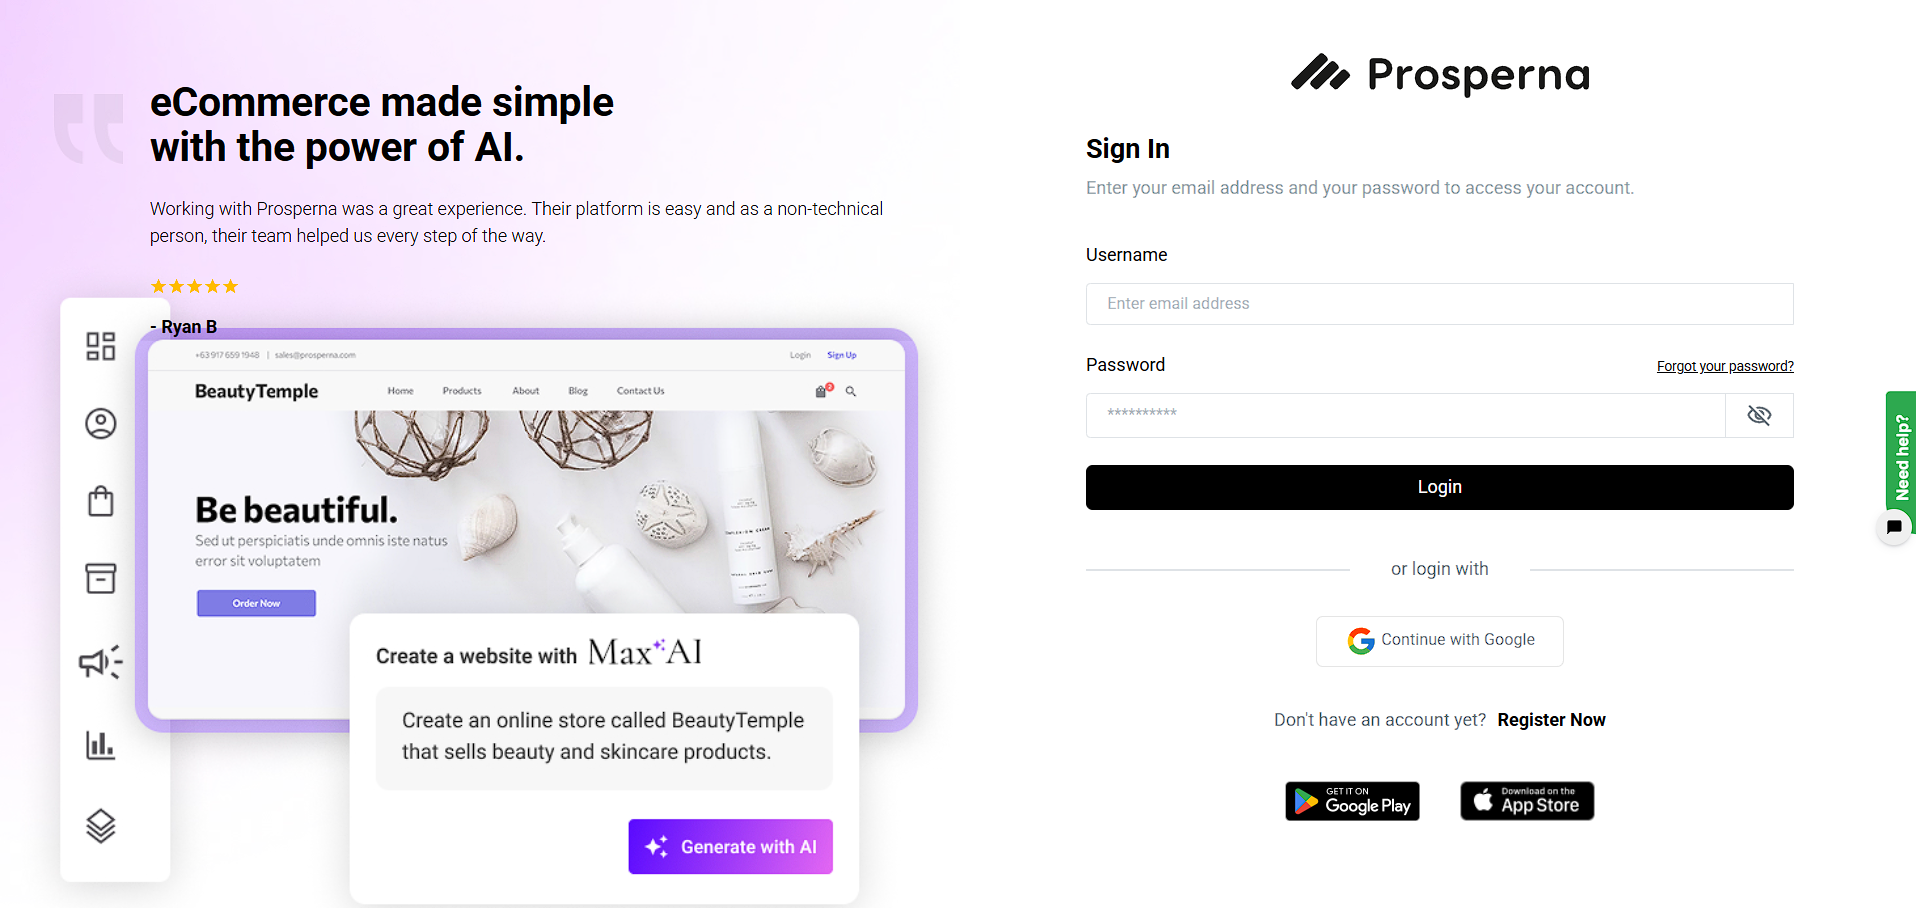
2. Complete the Registration Form
Enter your First and Last Name.
Enter your Email Address.
Create a Password and check the strength indicator.
Confirm your password by typing it again.
Click on the Register button.
3. Verify Your Account
Check your email inbox for a verification message.
Click the “Verify Email” button or link to activate your account.
Once verified, you can log in and start setting up your online store.
Results: Your account is successfully created.
You will be redirected to the log in page with the notification that your email is now verified. You will now be able to log in to your account.
Update Store Branding
Retail branding is a strategy for developing a strong perception of your store in your customers' eyes. It's the intentional actions you take to arouse favorable emotions and encourage clients to view your business in a particular way. A brand is typically an identity—the tale you tell clients to engage them.
1. Store Logo & Favicon
Upload Manually (or generate with AI)
File Type:
.jpg,.png, or.webpNo size limit specified in the screenshot, but smaller square formats (1:1 ratio) are ideal.
Recommended Logo Size: 500 × 500 px
Recommended Favicon Size: 32 × 32 px or 64 × 64 px
2. Store Background
Max Size: 10 MB
Min Resolution: 5 px × 5 px (any valid image)
File Type:
.jpg,.png,.webp
3. Social Media Share Image
Max Size: 10 MB
Min Resolution: 1200 px × 628 px
File Type:
.jpg,.png,.webp(This image is shown when your store link is shared on social media.)
4. Cover Photo (Default – Desktop)
Max Size: 10 MB
Min Resolution: 820 px × 312 px
Recommended Max Resolution: 1600 × 600 px
File Type:
.jpg,.png,.webp
5. Cover Photo (Desktop – Wide)
Max Size: 10 MB
Min Resolution: 1440 px × 600 px
Recommended Max Resolution: 1920 × 600 px
File Type:
.jpg,.png,.webp
6. Cover Photo (Mobile)
Max Size: 10 MB
Min Resolution: 640 px × 360 px
File Type:
.jpg,.png,.webp
Summary
Go to Page Builder, then select Design Settings.
Select Store Branding.
Complete the Fields.
Save.
Steps to update Logo, Favicon, Cover Photo, Background and Social Media Share Image
1. Go to Page Builder, then select Design Settings

2. Select Store Branding
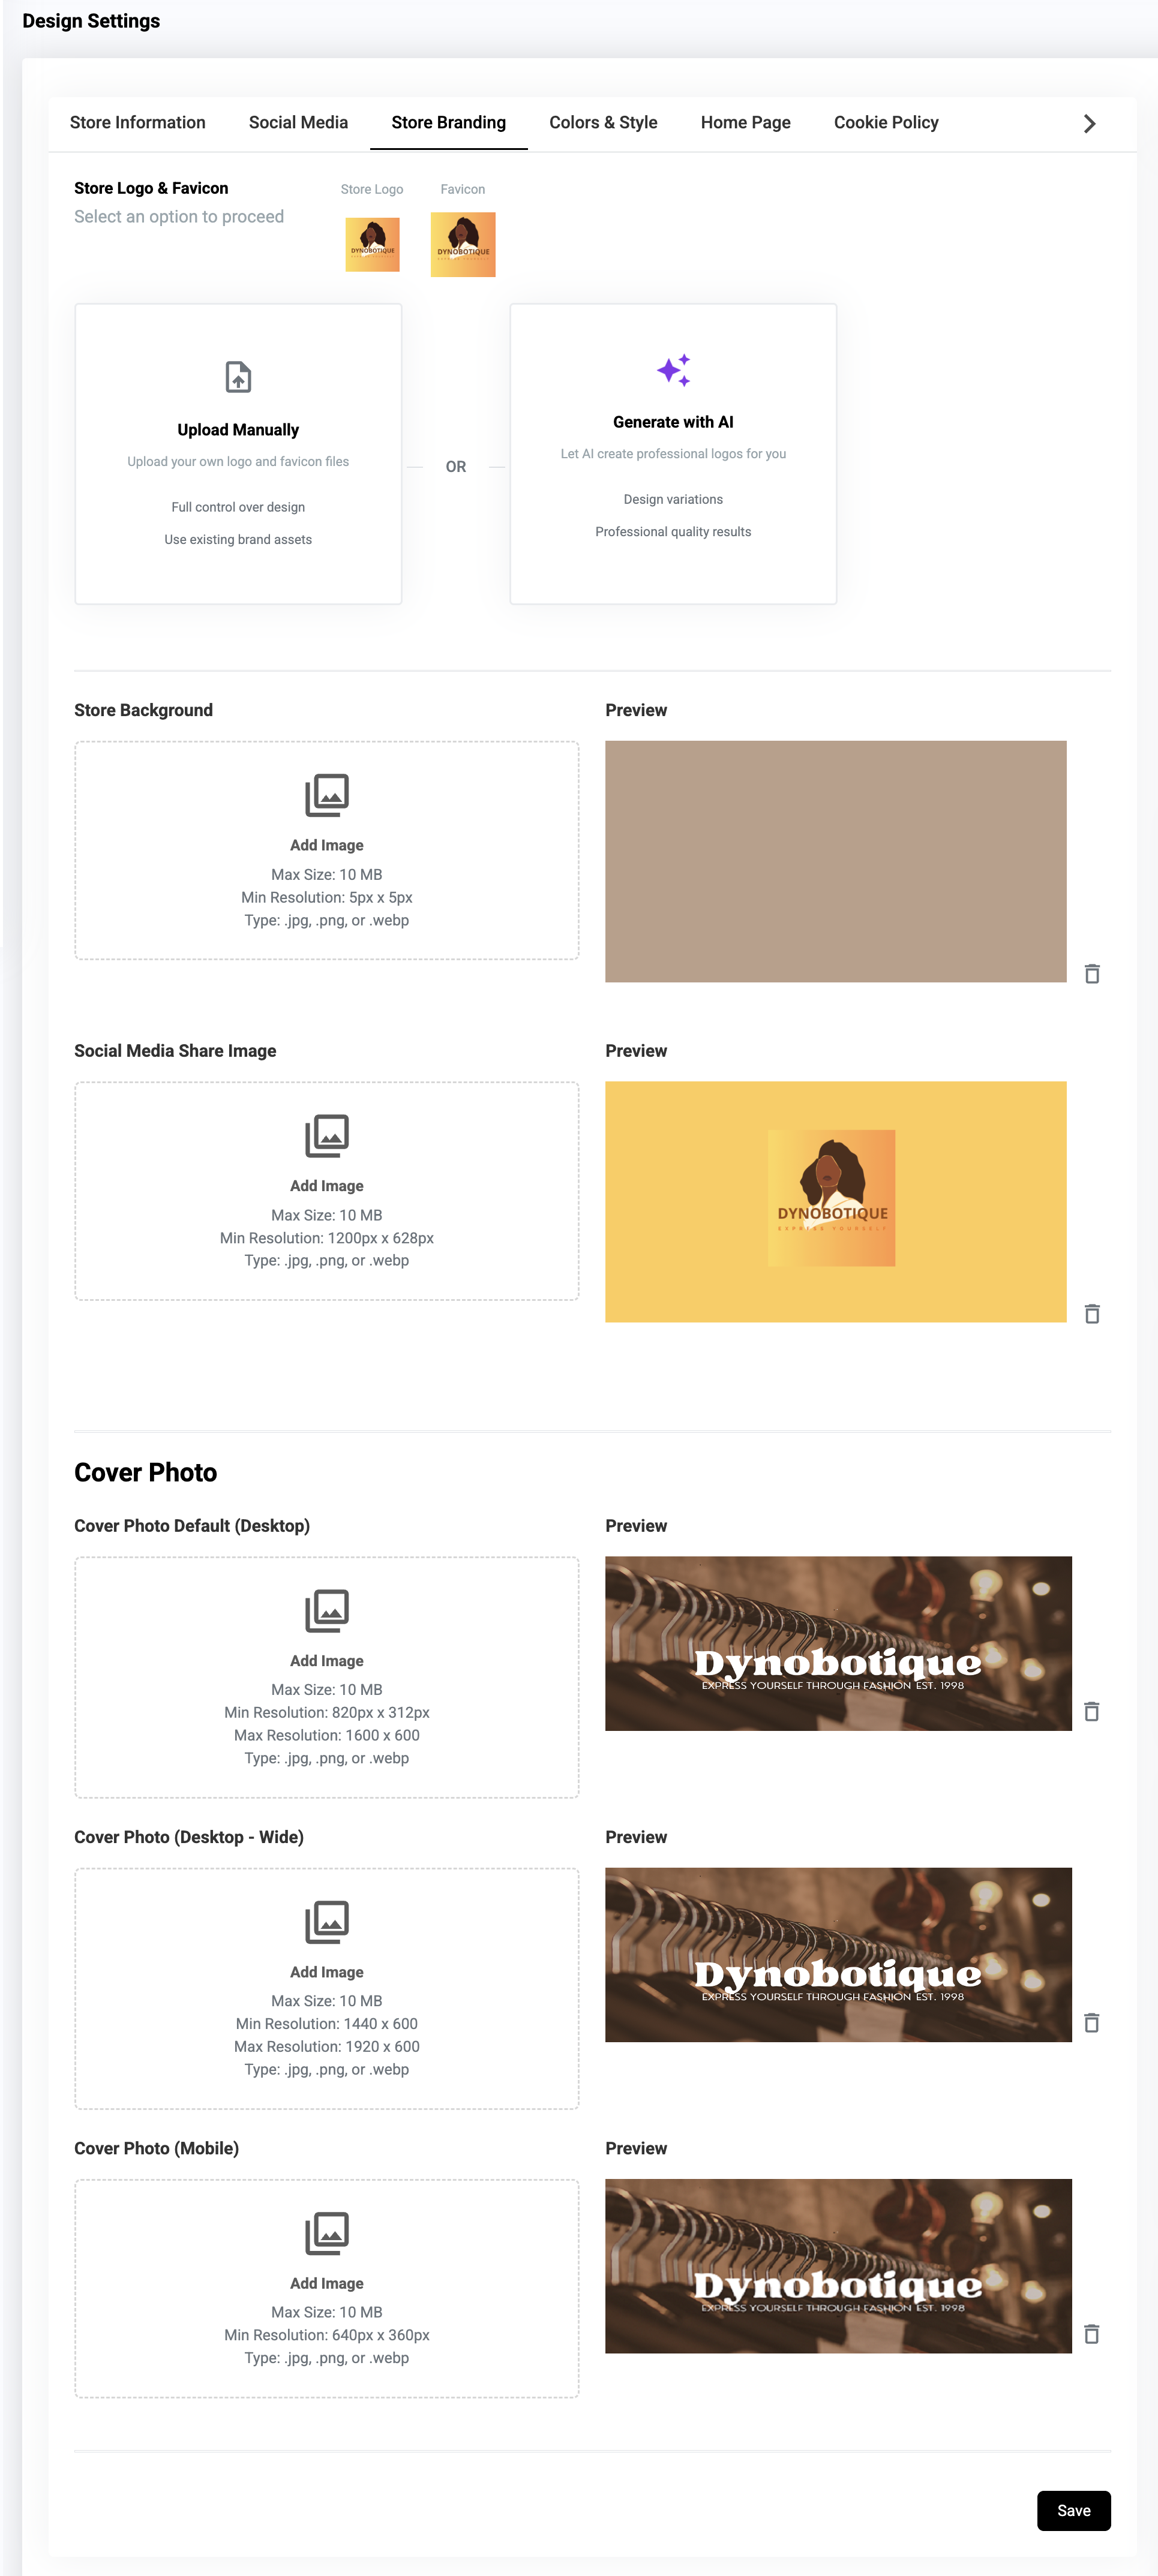
3. Complete the Fields
Logo - brand logo
Logo Style - shape of your logo
Favicon - website icon
Cover Photo - banner photo
Background - background image / color
Social Media Share Image - thumbnail showed when sharing website on Social Media
3.1 Adding Logo
Click Drop files here or click to upload (or generate with AI)
Select the Image
Click Open
3.2 Adding Favicon
What is a favicon? A favicon is a small icon or collection of icons associated with a website, web page, or web application. It’s displayed within the browser tabs and bookmarks bar. See example below.
Note: Your Store Logo is the same as your favicon.Click Drop files here or click to upload (or generate with AI)
Select the Image
Click Open
3.3 Store Background
You may add a background photo to your preference.
Upload the image here.
Click Open
3.4 Social Media Share Image
Upload the image here.
Click Open
3.5 Cover Photo
Note: By default, the cover photo is the same for all locations. If you want a different cover photo for each location, disable the "Display Across All Store Locations" option. Check here for instructions on updating the cover photo for each location.
Click Drop files here or click to upload
Select the Image
Click Open
4. Save
For every section that you edit, make sure to click Save to update the changes.
Result: You have successfully updated your Logo, Favicon, Cover Photo, Background color and Social Media Share Image.
Update Store Location
When setting up your Prosperna account, your store location is one of the first things we ask to make it easier for customers and shipping providers to know where you are.
Steps to Update Store Location
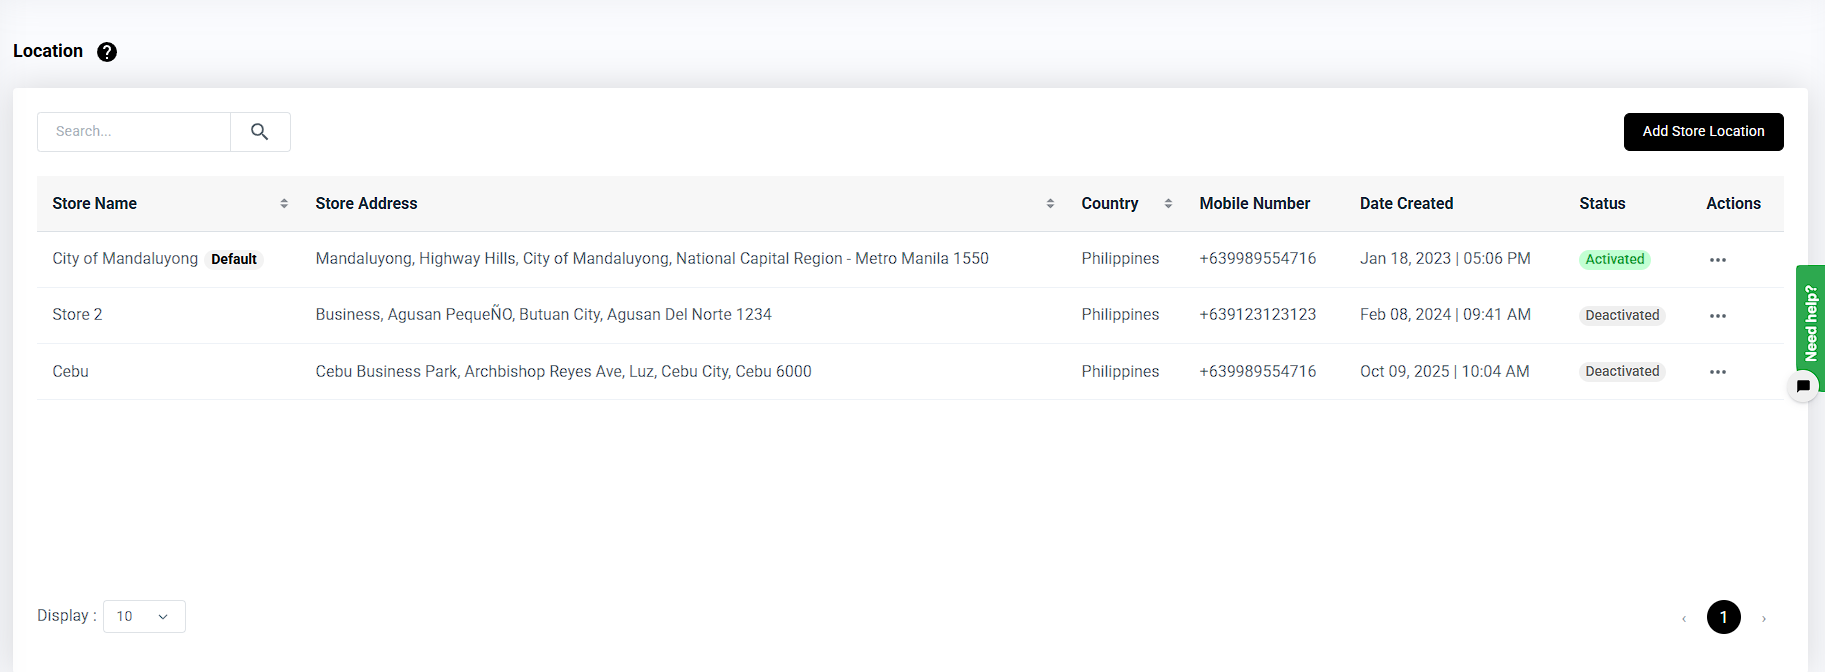
1. Go to Store Settings
From your Prosperna Dashboard, click on Settings in the left-hand menu.
Under Settings, select Store Locations

2. Add or Edit a Store Location
Click the Add Store Location button on the right-hand side.
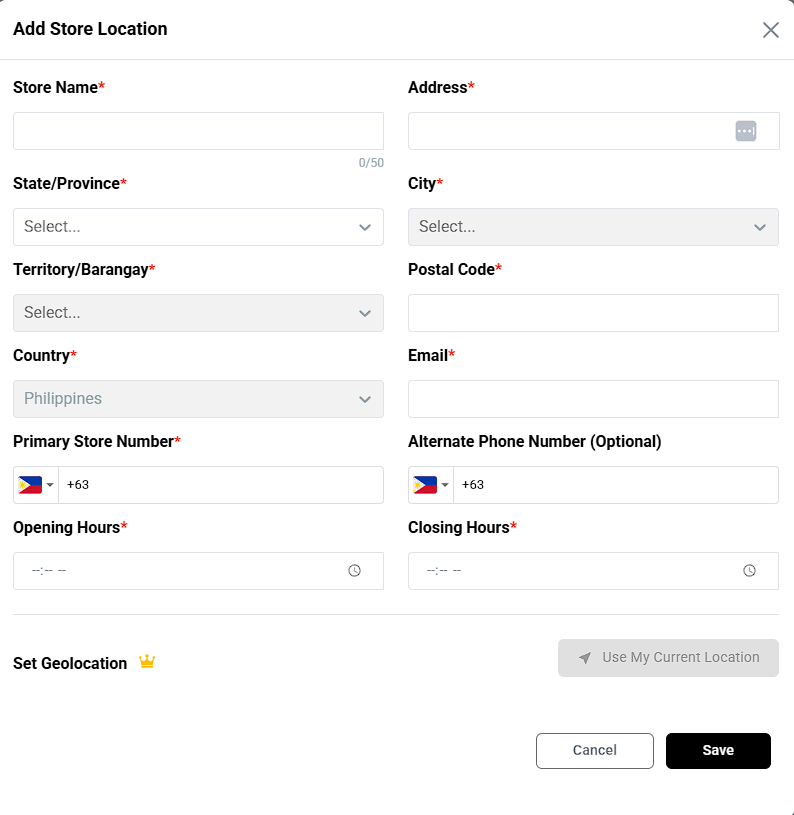
3. Fill out your store’s details such as:
Store Name
Address
City/Region
Postal Code
Contact Information
Once done, click Save to apply your changes.
If you already have a store listed, you can edit the existing location instead of adding a new one.
Upload a Product
Steps to Add Product
1. Shortcut: Follow the Setup Guide
Choose a Product to Upload
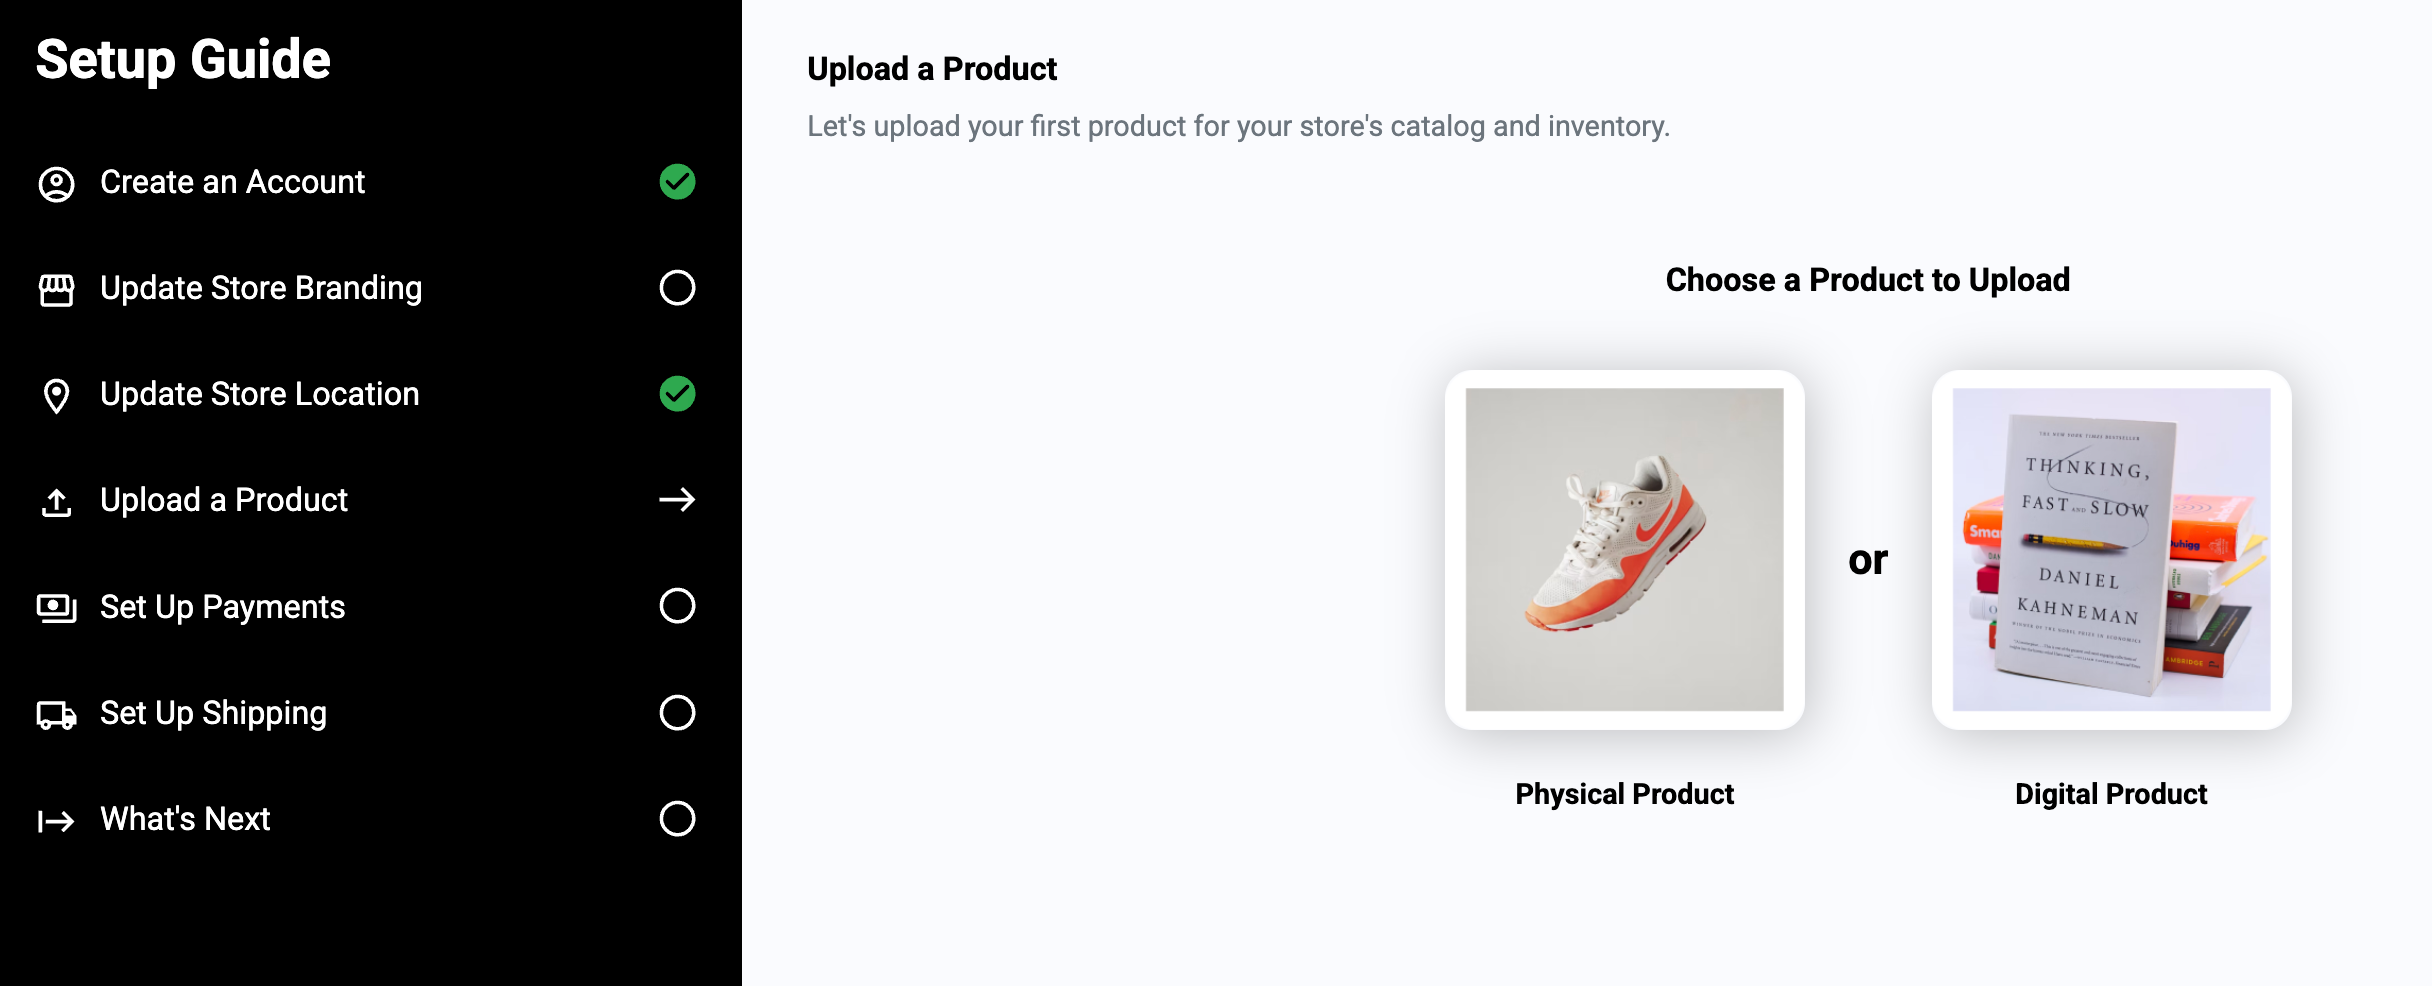
For Digital Product you may follow the steps below:
For Bulk Upload you may follow the steps below:
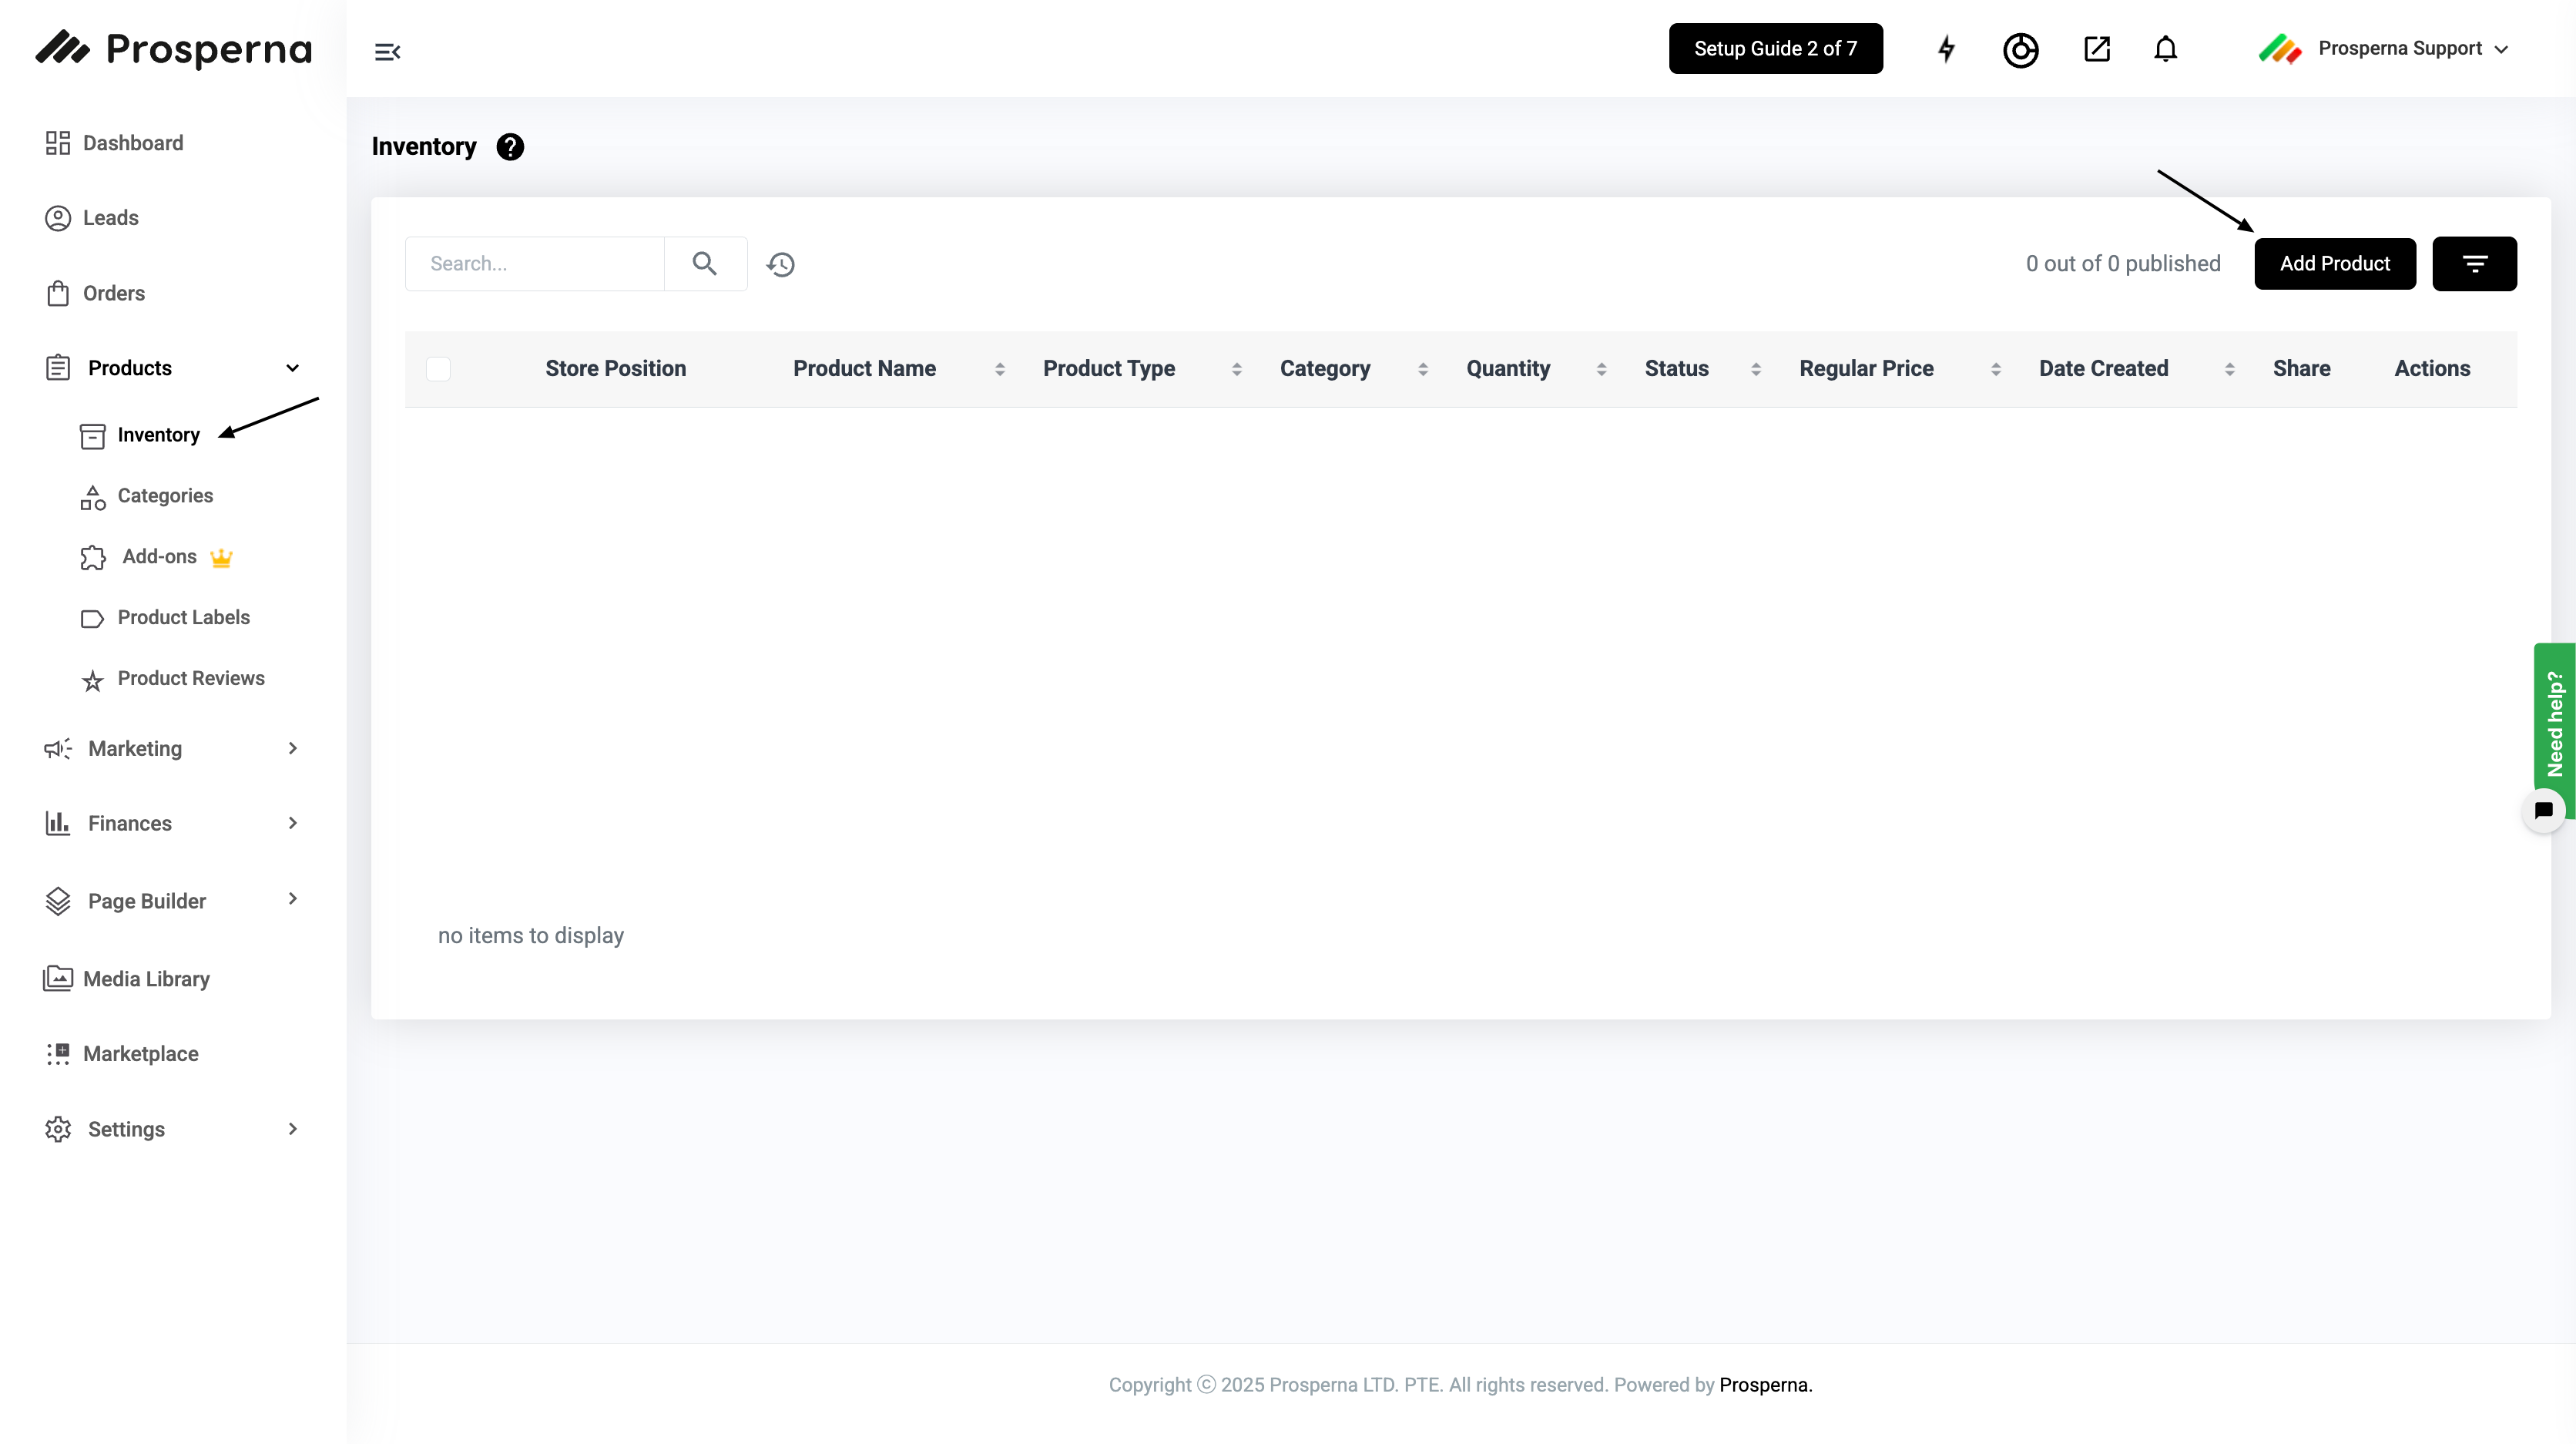
2. Or, Go to Products, select Inventory.
Click Add Product. Select either Physical or Digital Product
3. Complete the fields and click Save.
Only a selected number of fields are required to allow you to upload a product. But for a better customer experience, we recommend being as detailed as possible.
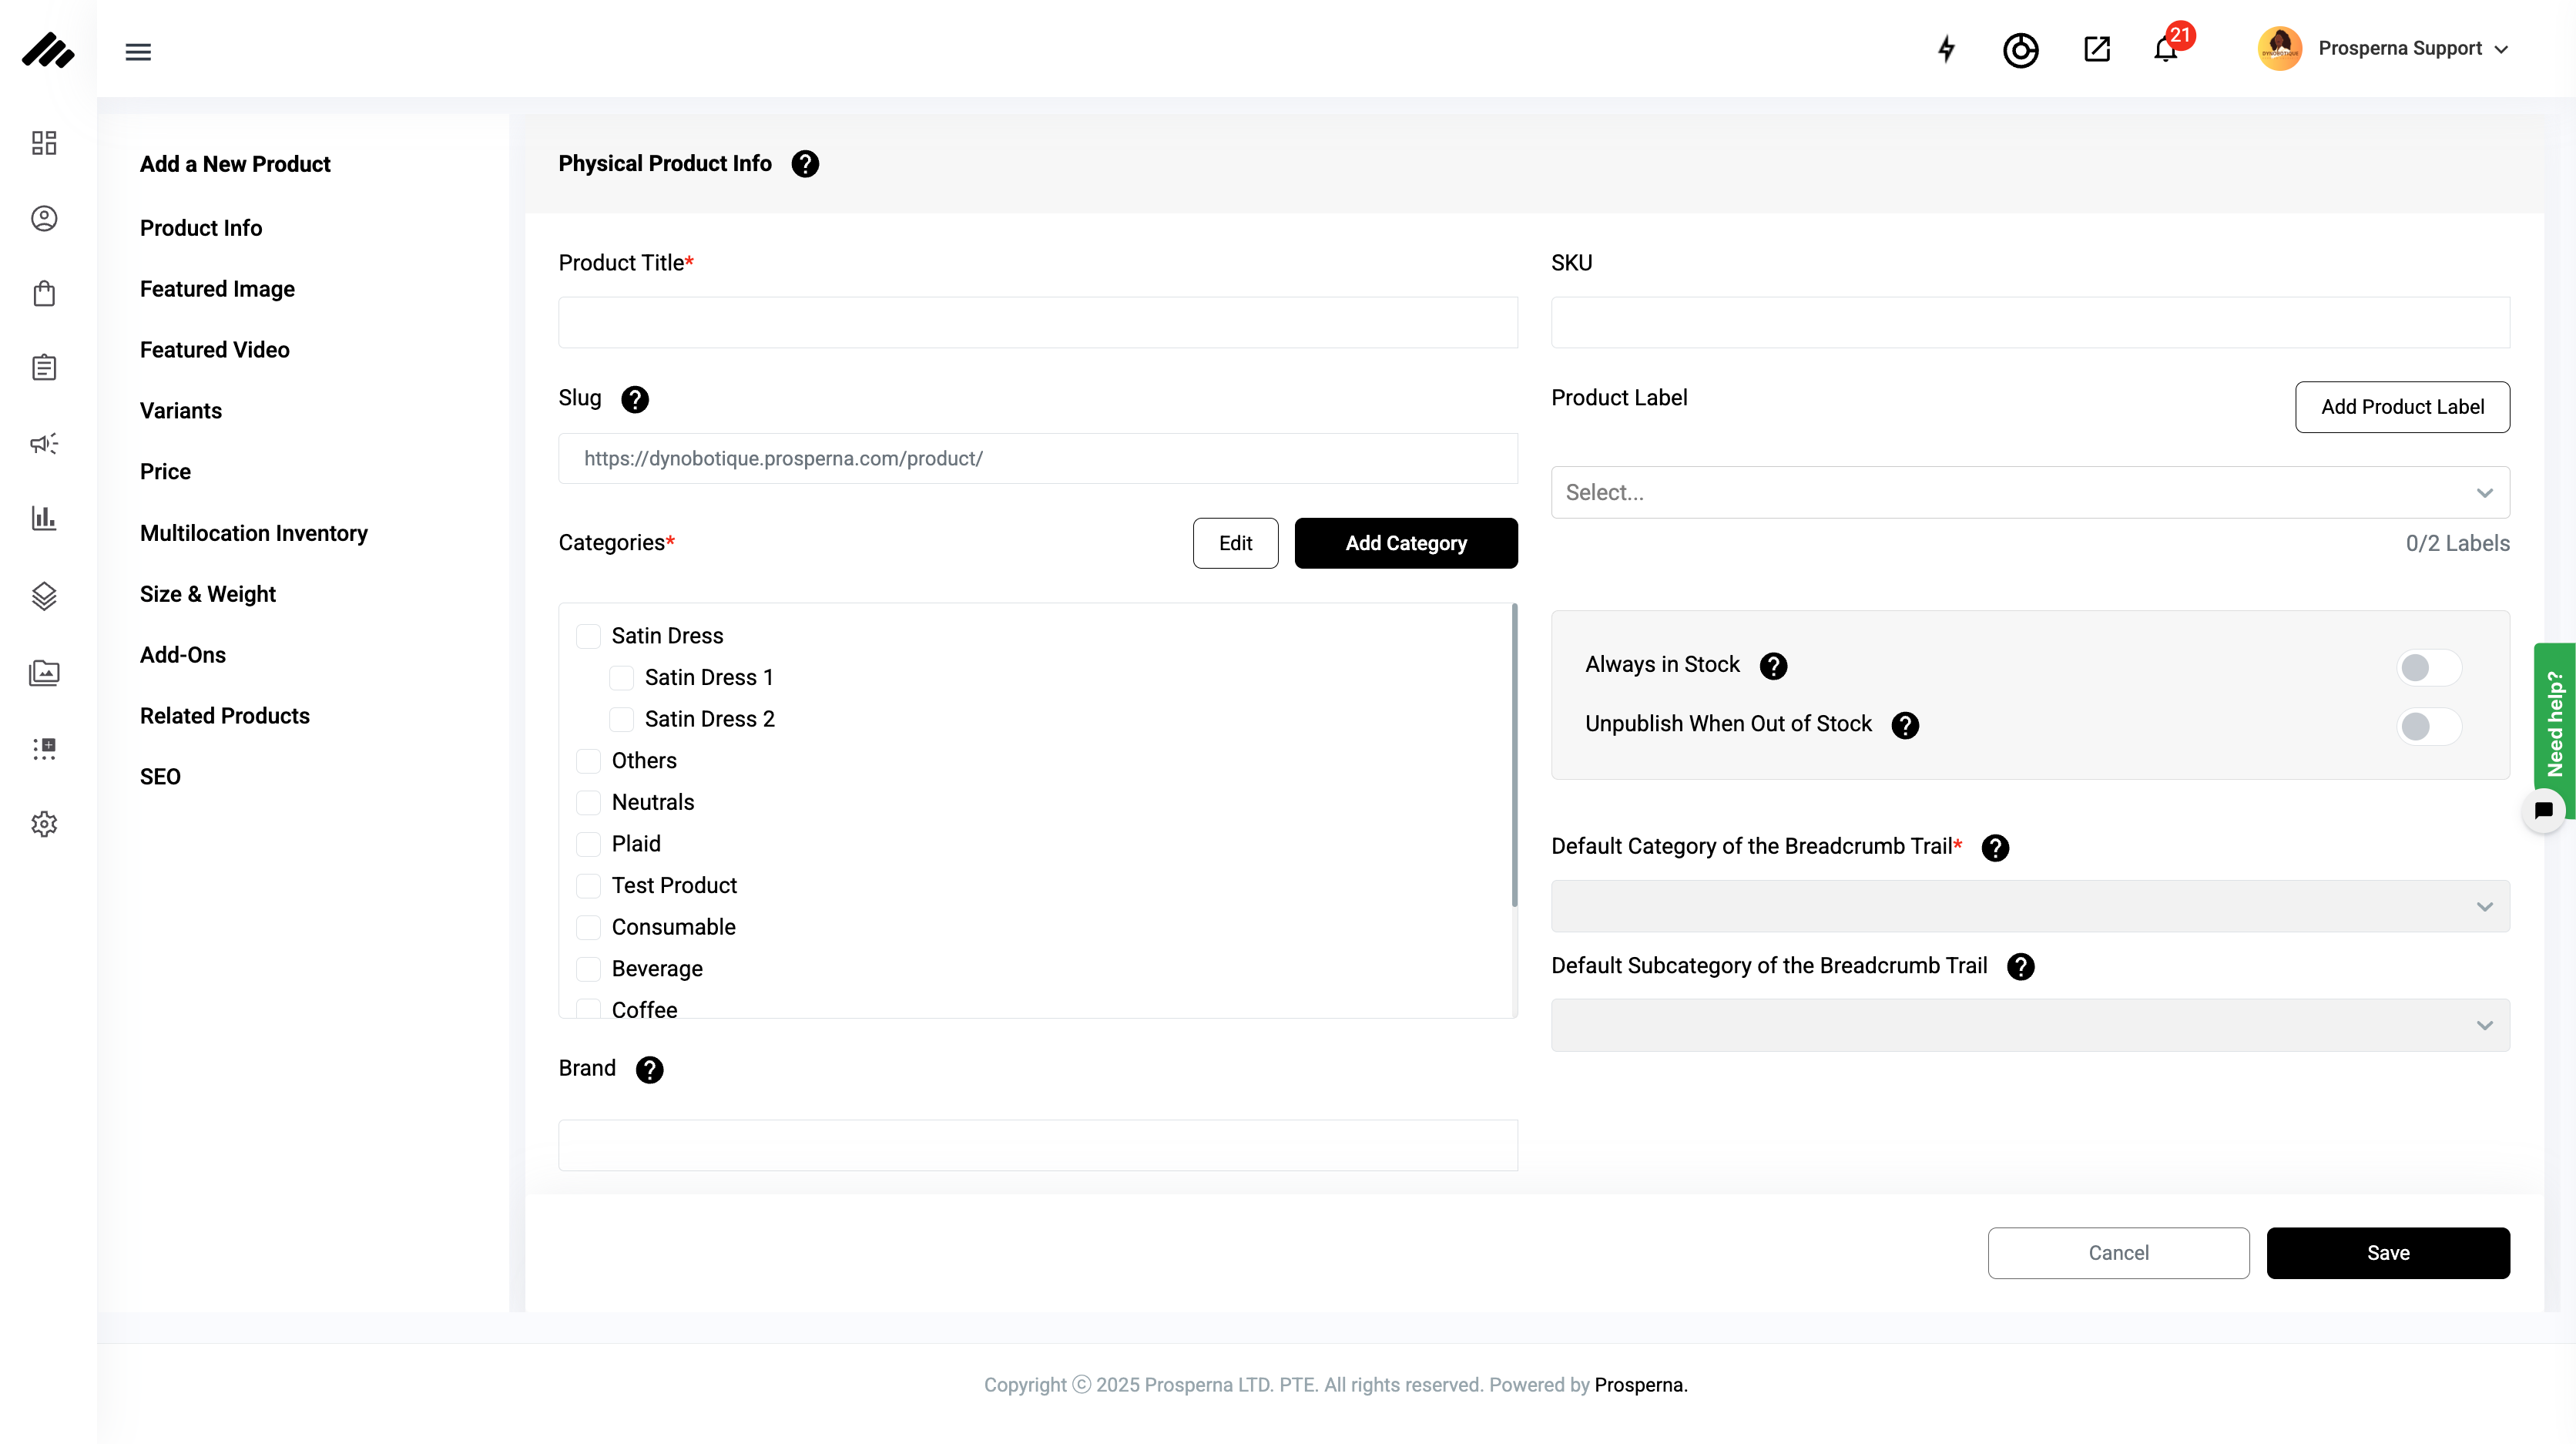
Featured Image and Videos - Upload photos/ Videos that represent the product/item that you are selling.
Product Title - How you'd like your product to be called or searched.
Product Label - Allows merchants with the ability to attach label tags to their product images in their product listing.
Slug - Part of URL that explains content e.g. “https://app.prosperna.com/store/slug”
Categories - Add Categories will allow you to add the different categories that your product may be under.
Always in Stock - Enable to set the product stocks as always available to be purchased.
Hide Products Automatically When Out of Stock - Enable to automatically hide products that have zero stocks or is out of stock.
Brand - Name the brand of this product/item.
Short Description - This is a short marketing statement that describes your product. (you’ll see the Max AI icon or prompt box.)
Long Description - This is dedicated for the long and descriptive discussion of what the product is and why it is worth purchasing. (you’ll see the Max AI icon or prompt box.)
Size & Weight - This is where you can add the length, width, height, and weight of your product.
Price - The price that your customers will pay when purchasing your product.
Sale Price - The discounted price at which your product will be sold due to a sale. If this field is empty, the selling price to be followed is the amount you provided for the Price.
Unit Cost - Your cost to produce, store and sell one unit of this product or service.
Margin - The amount of profit that you make calculated by (Price/Sale Price - Unit Cost) = Your Margin
Multi-location Inventory - Add stocks of products per available store location
Related Products - Add existing products in the inventory that is similar to the current product
Stock Quantity - The amount of stock the product has per store.
Variants - A variant can be added to a product that comes in more than one option, such as size or color.
Add-Ons - Add-ons for the products are additional items with a separate price from the Main Product.
SEO - View and edit your product’s SEO to help customers find your products on search engines. (you’ll see the Max AI icon or prompt box.)
Note: Make sure to click Save to update the changes.
Set Up Payments
To increase customer convenience and generate more revenue, activate your myPay by submitting relevant KYB documents.
Once approved, you’ll be able to unlock all of our available payment options.
1. Shortcut: Follow the Setup Guide
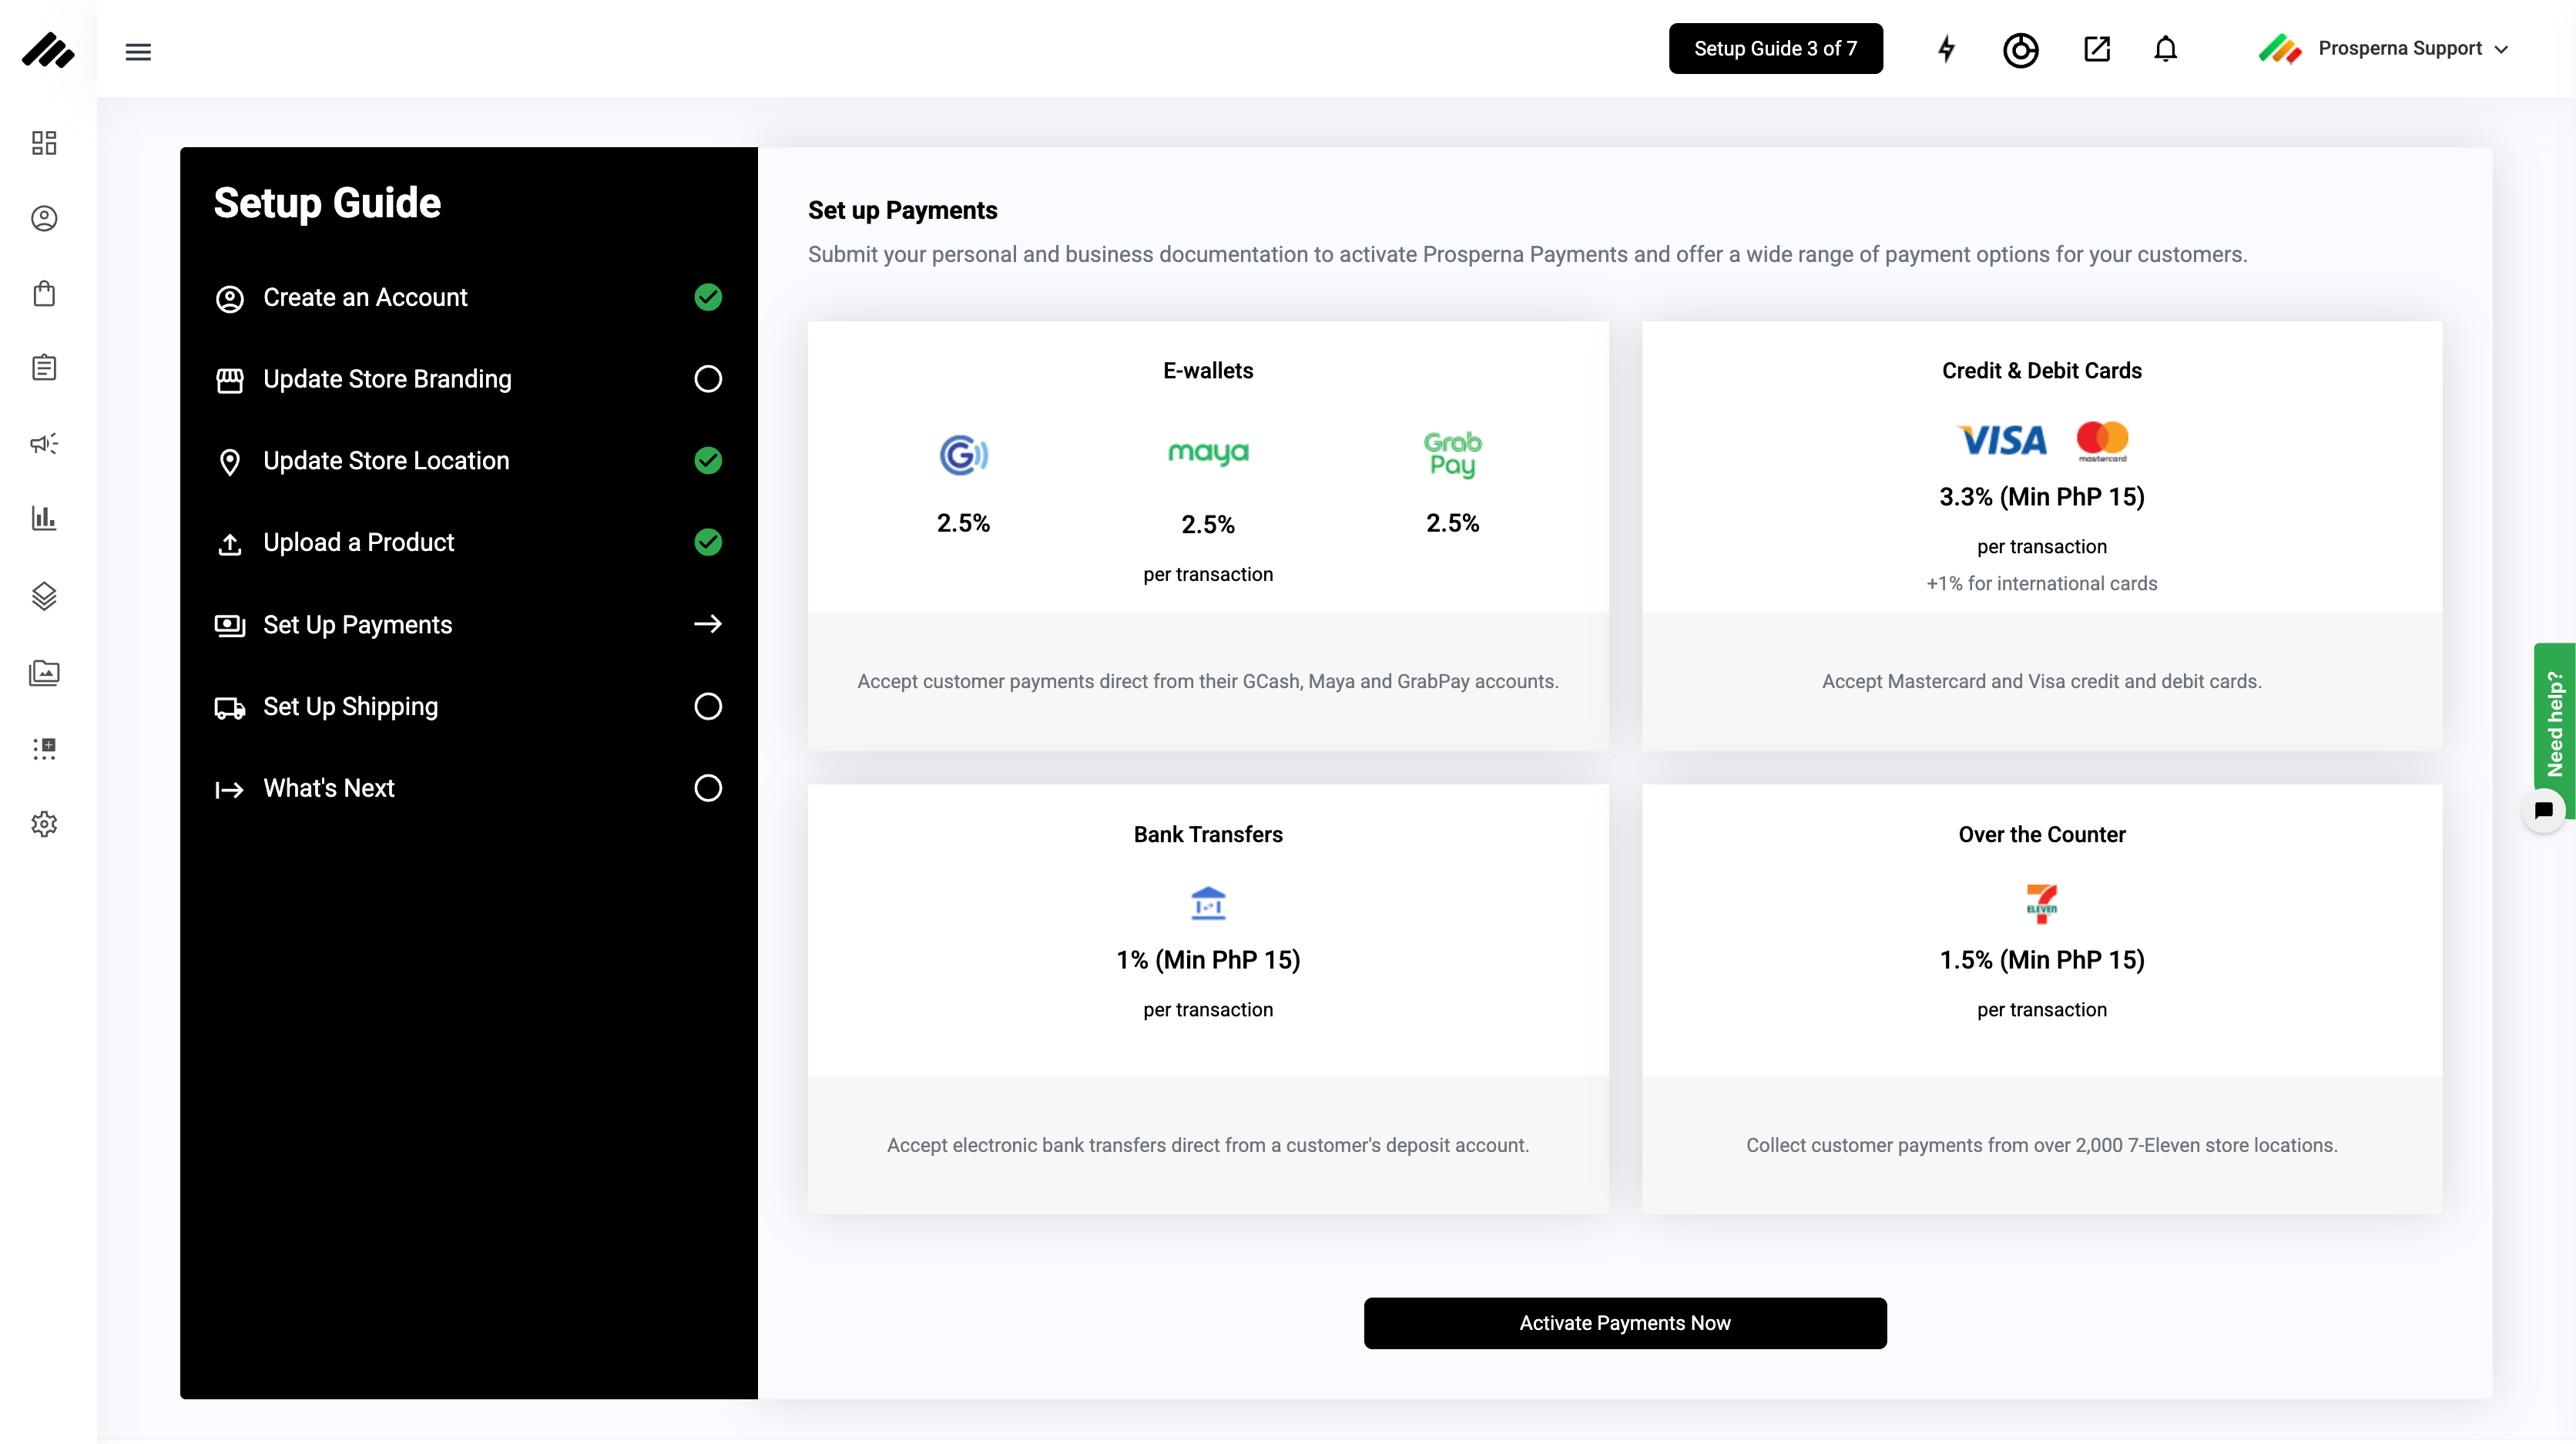
Note : You must verify your mobile number first before you can activate payments.
2. Or, Go to Settings, Select Payments & Click Activate Now.

You should be redirected to the Submit Requirements Page.
3. Submit Personal Information
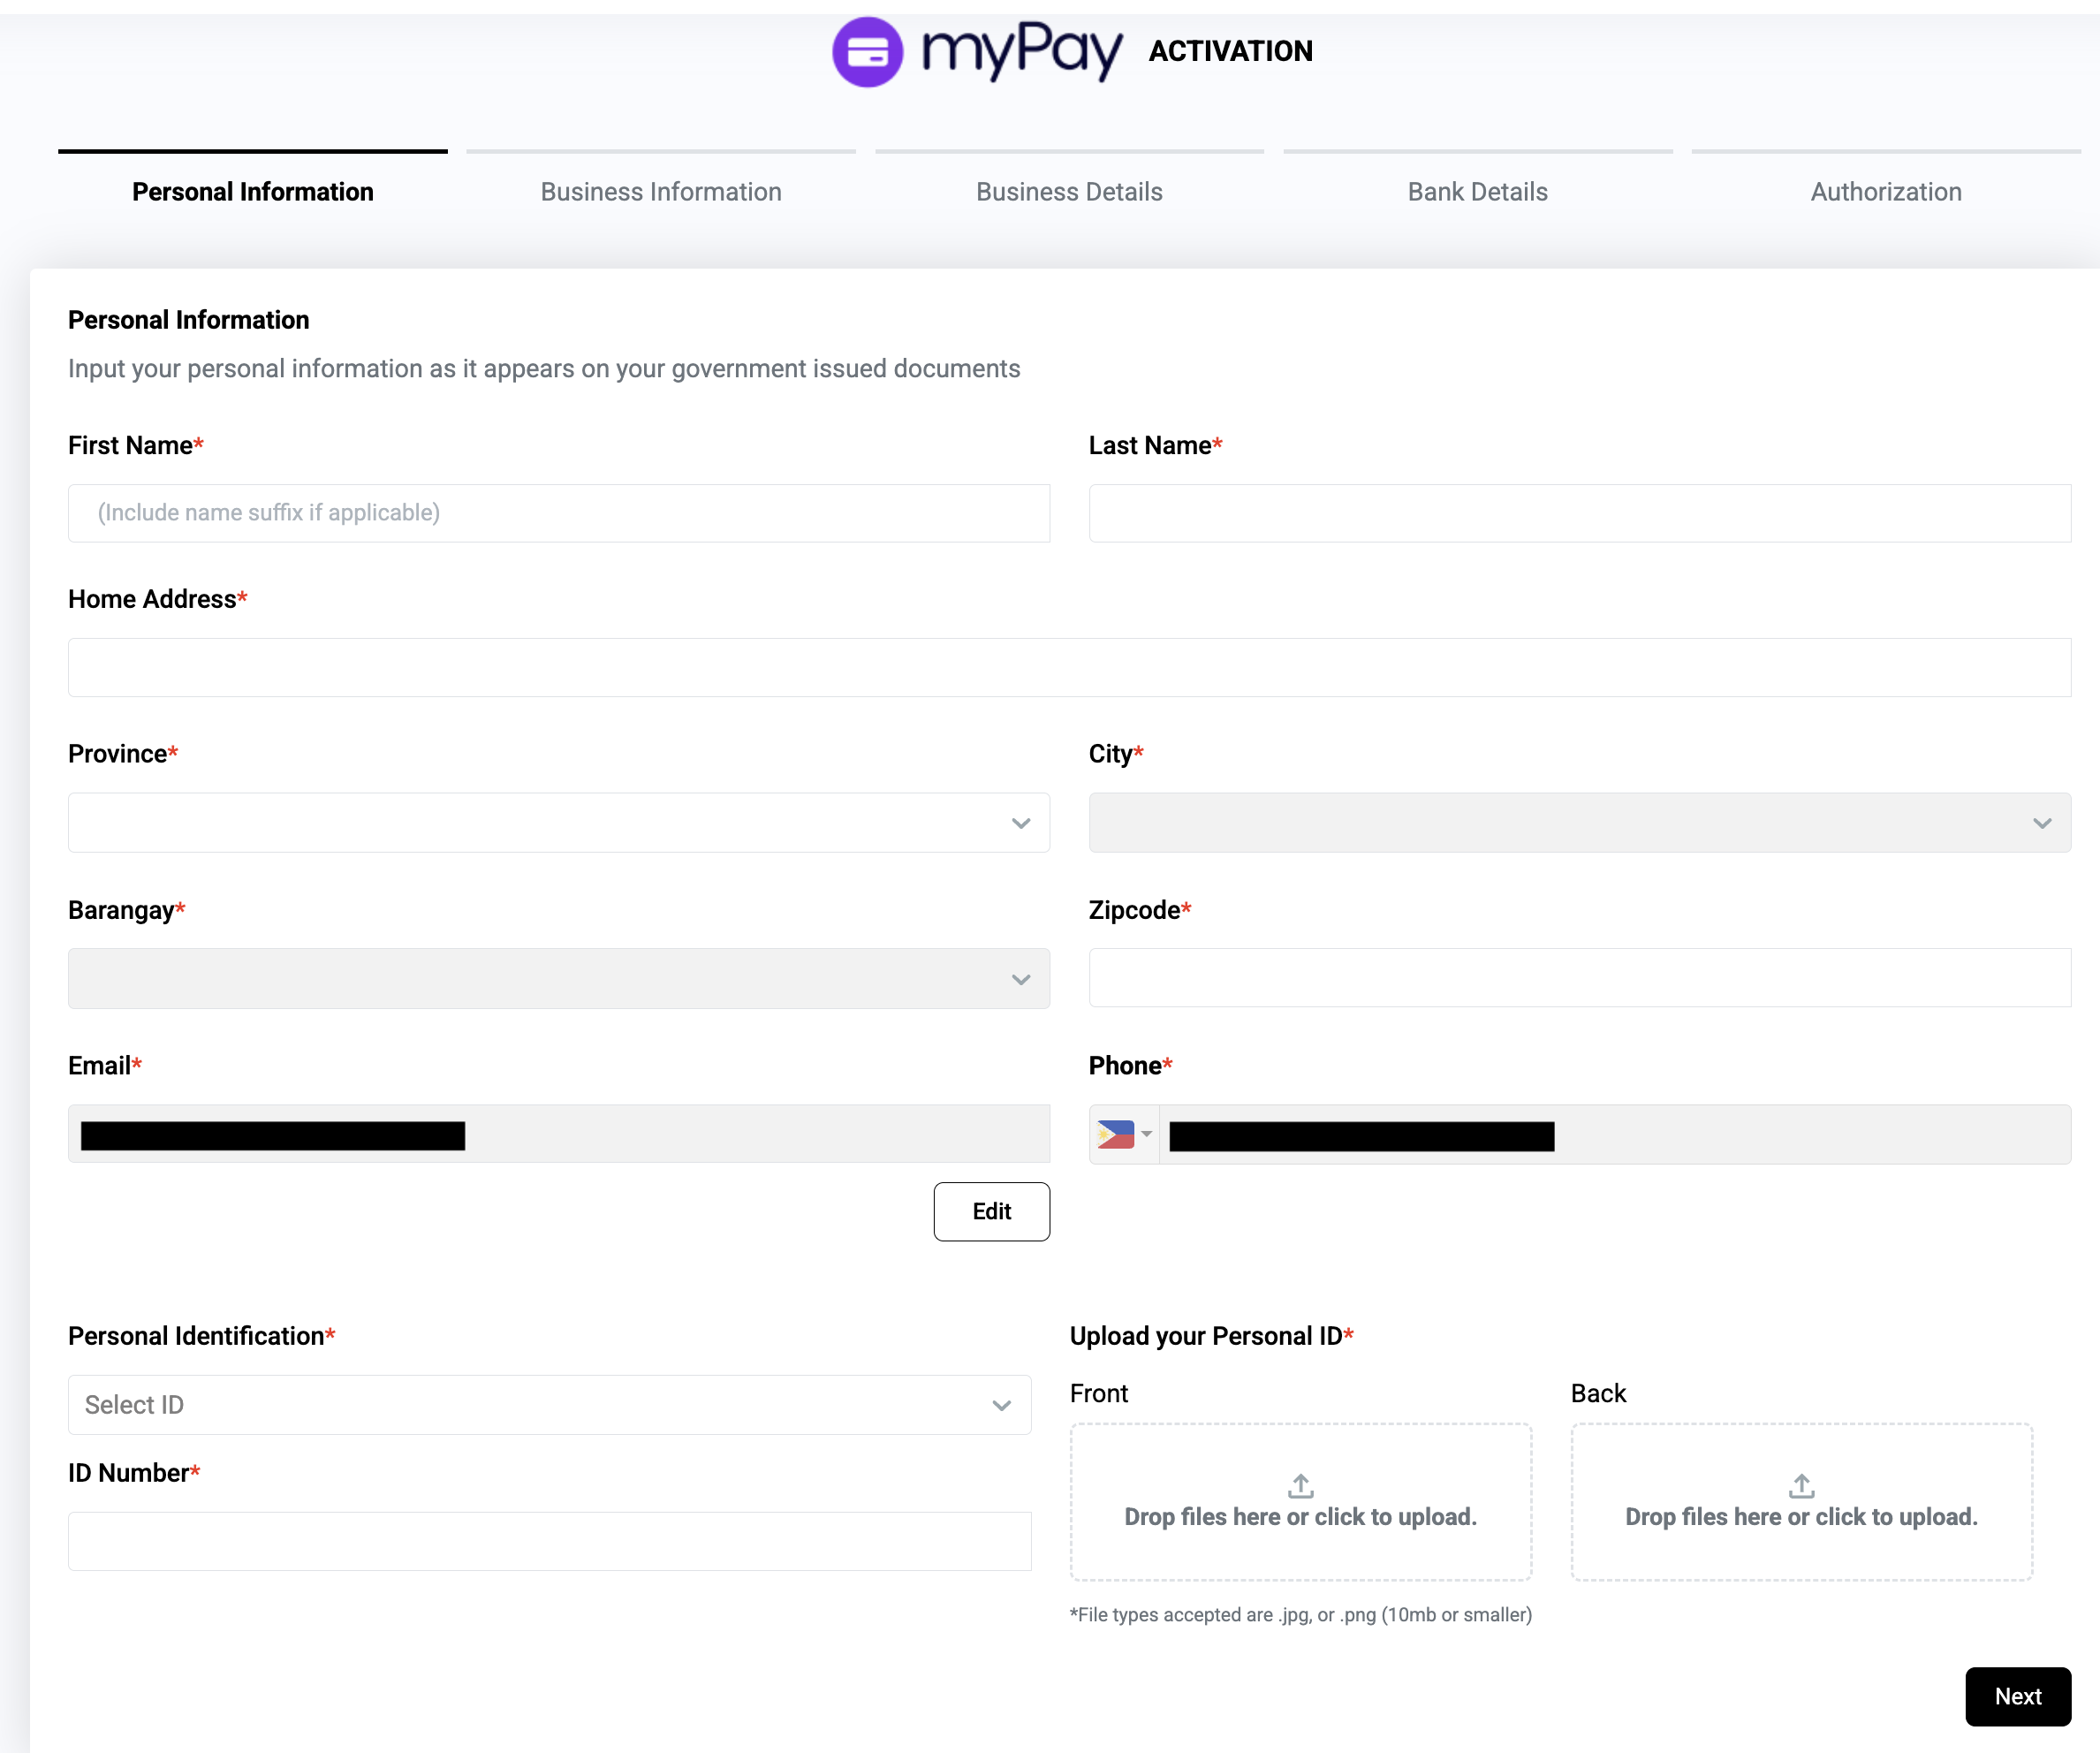
Note:
File type accepted is .jpg or .png with a minimum size of 10MB or smaller
A unique email must be used. A repeat email used in other Prosperna account will not be accepted.
You must confirm the code sent to the nominated email to proceed to the next step.
4. Submit your Business Information
Individual Application
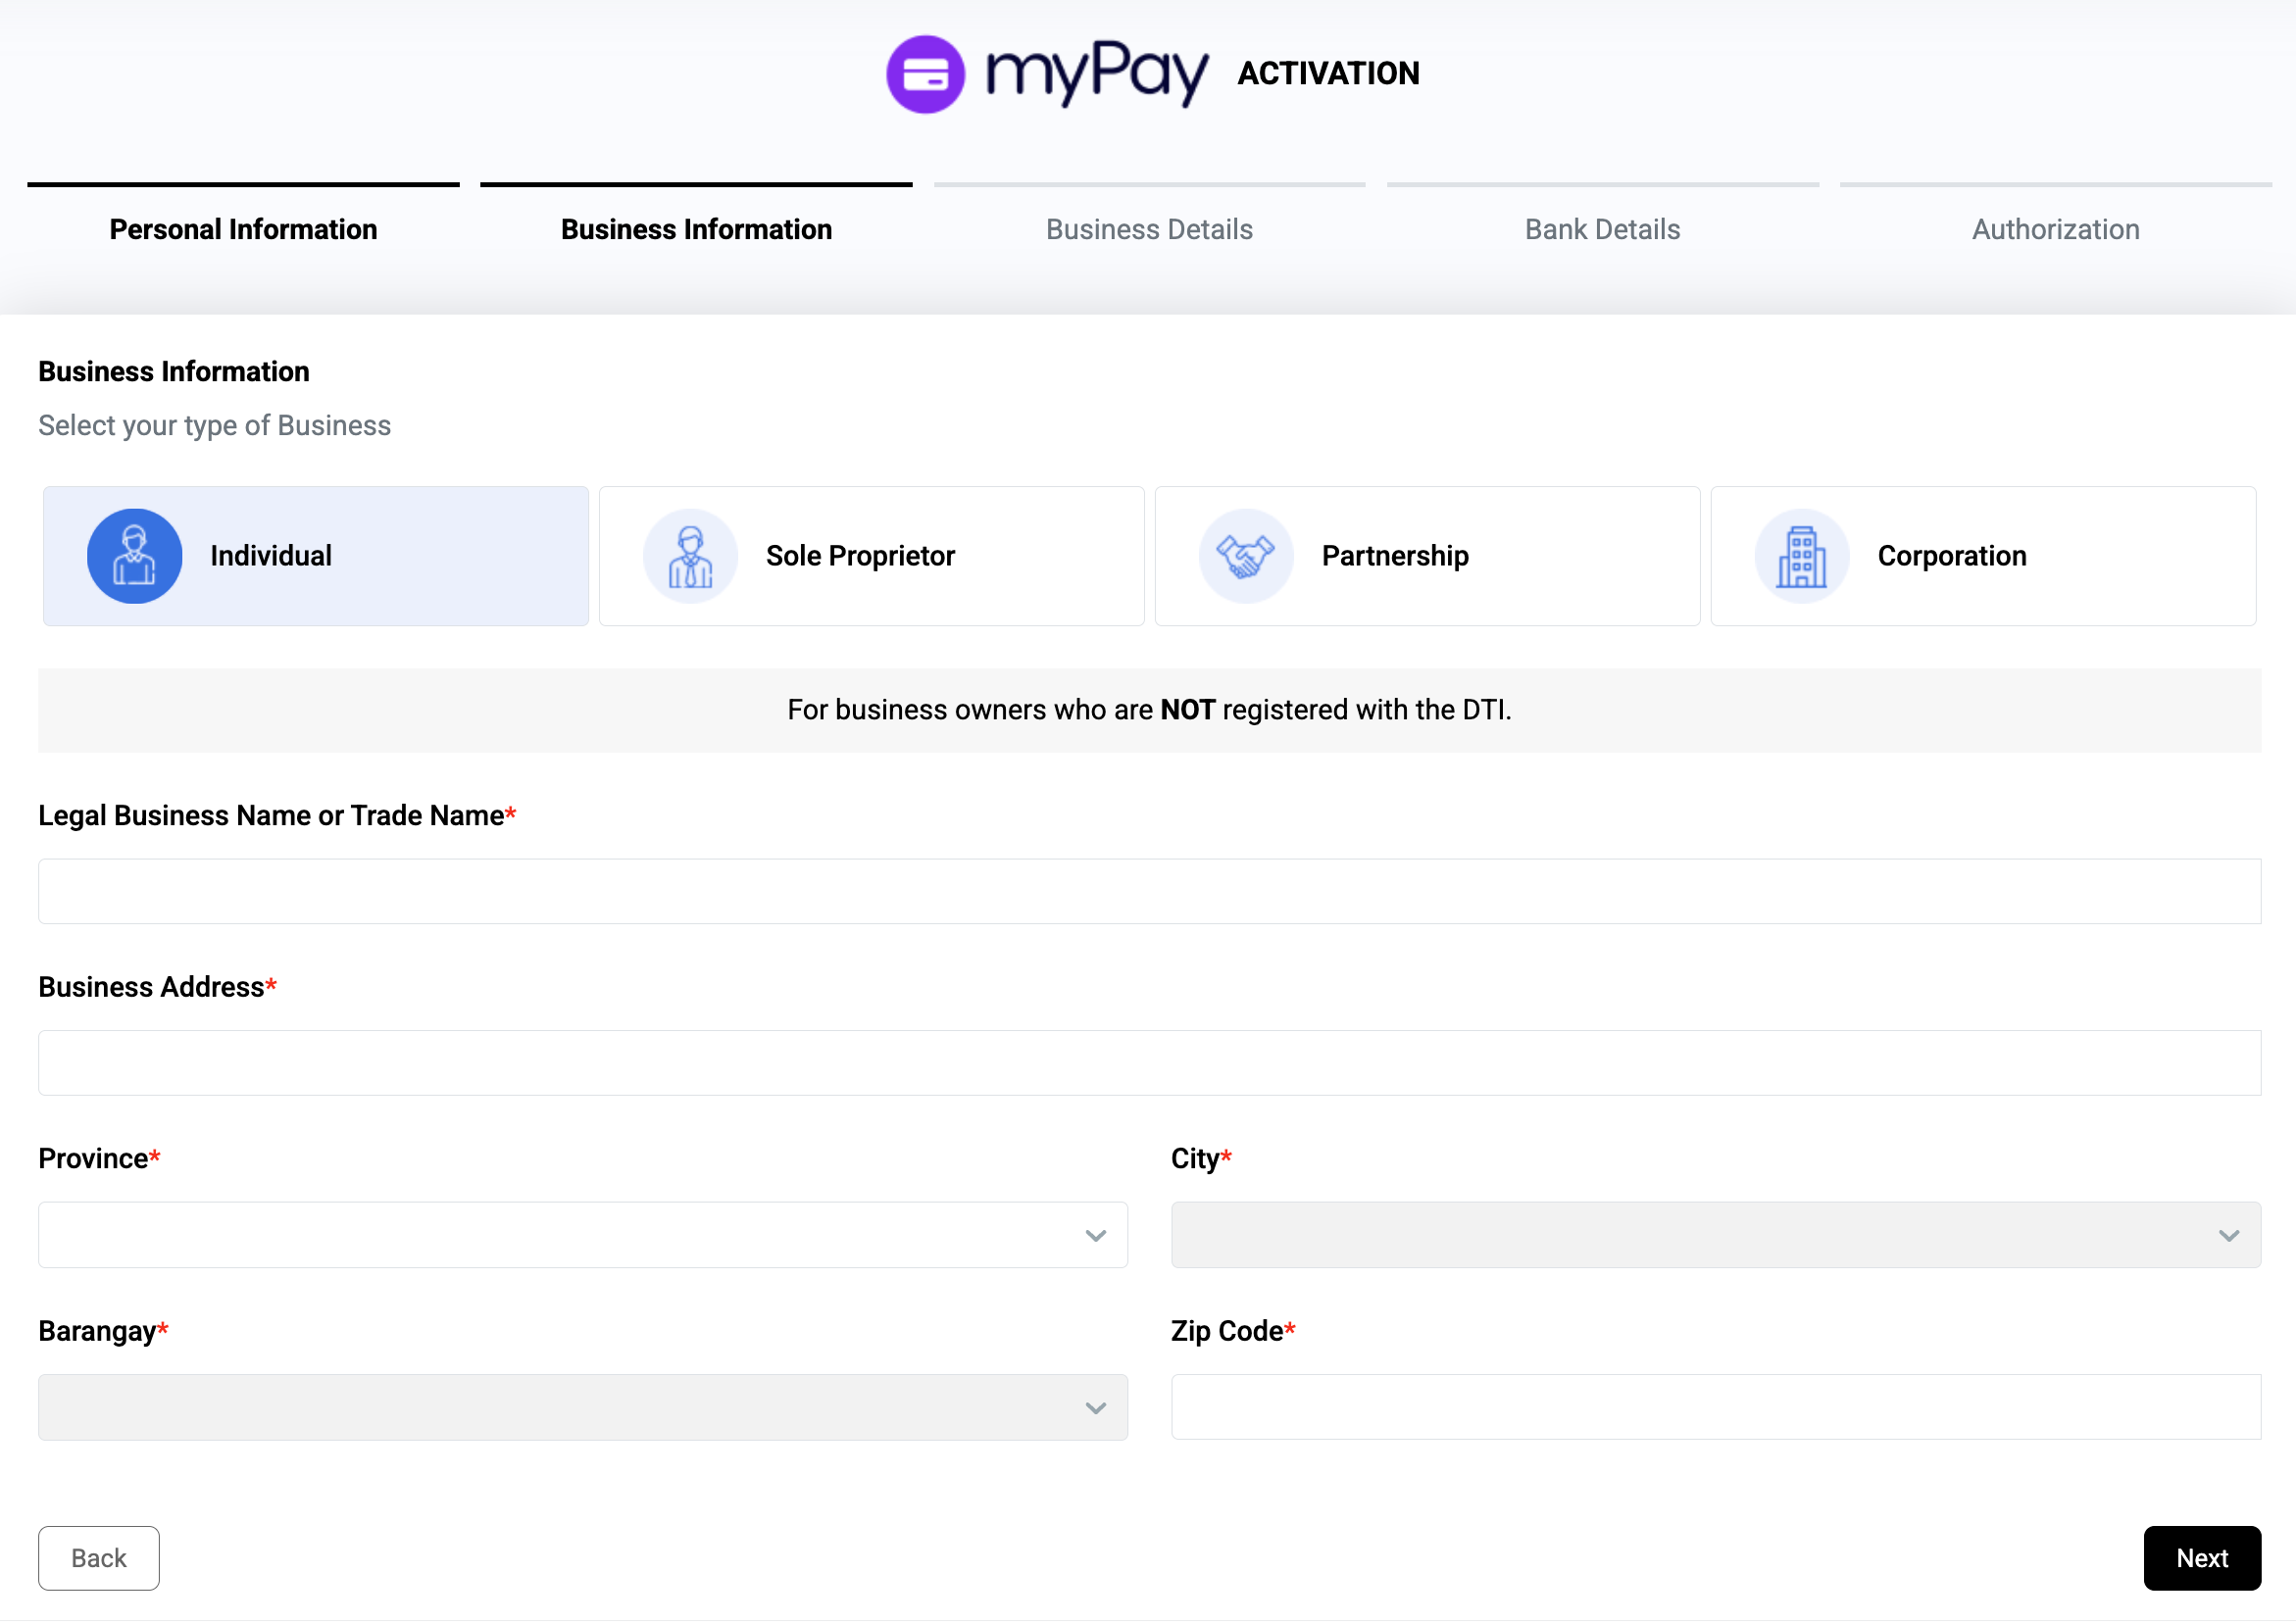
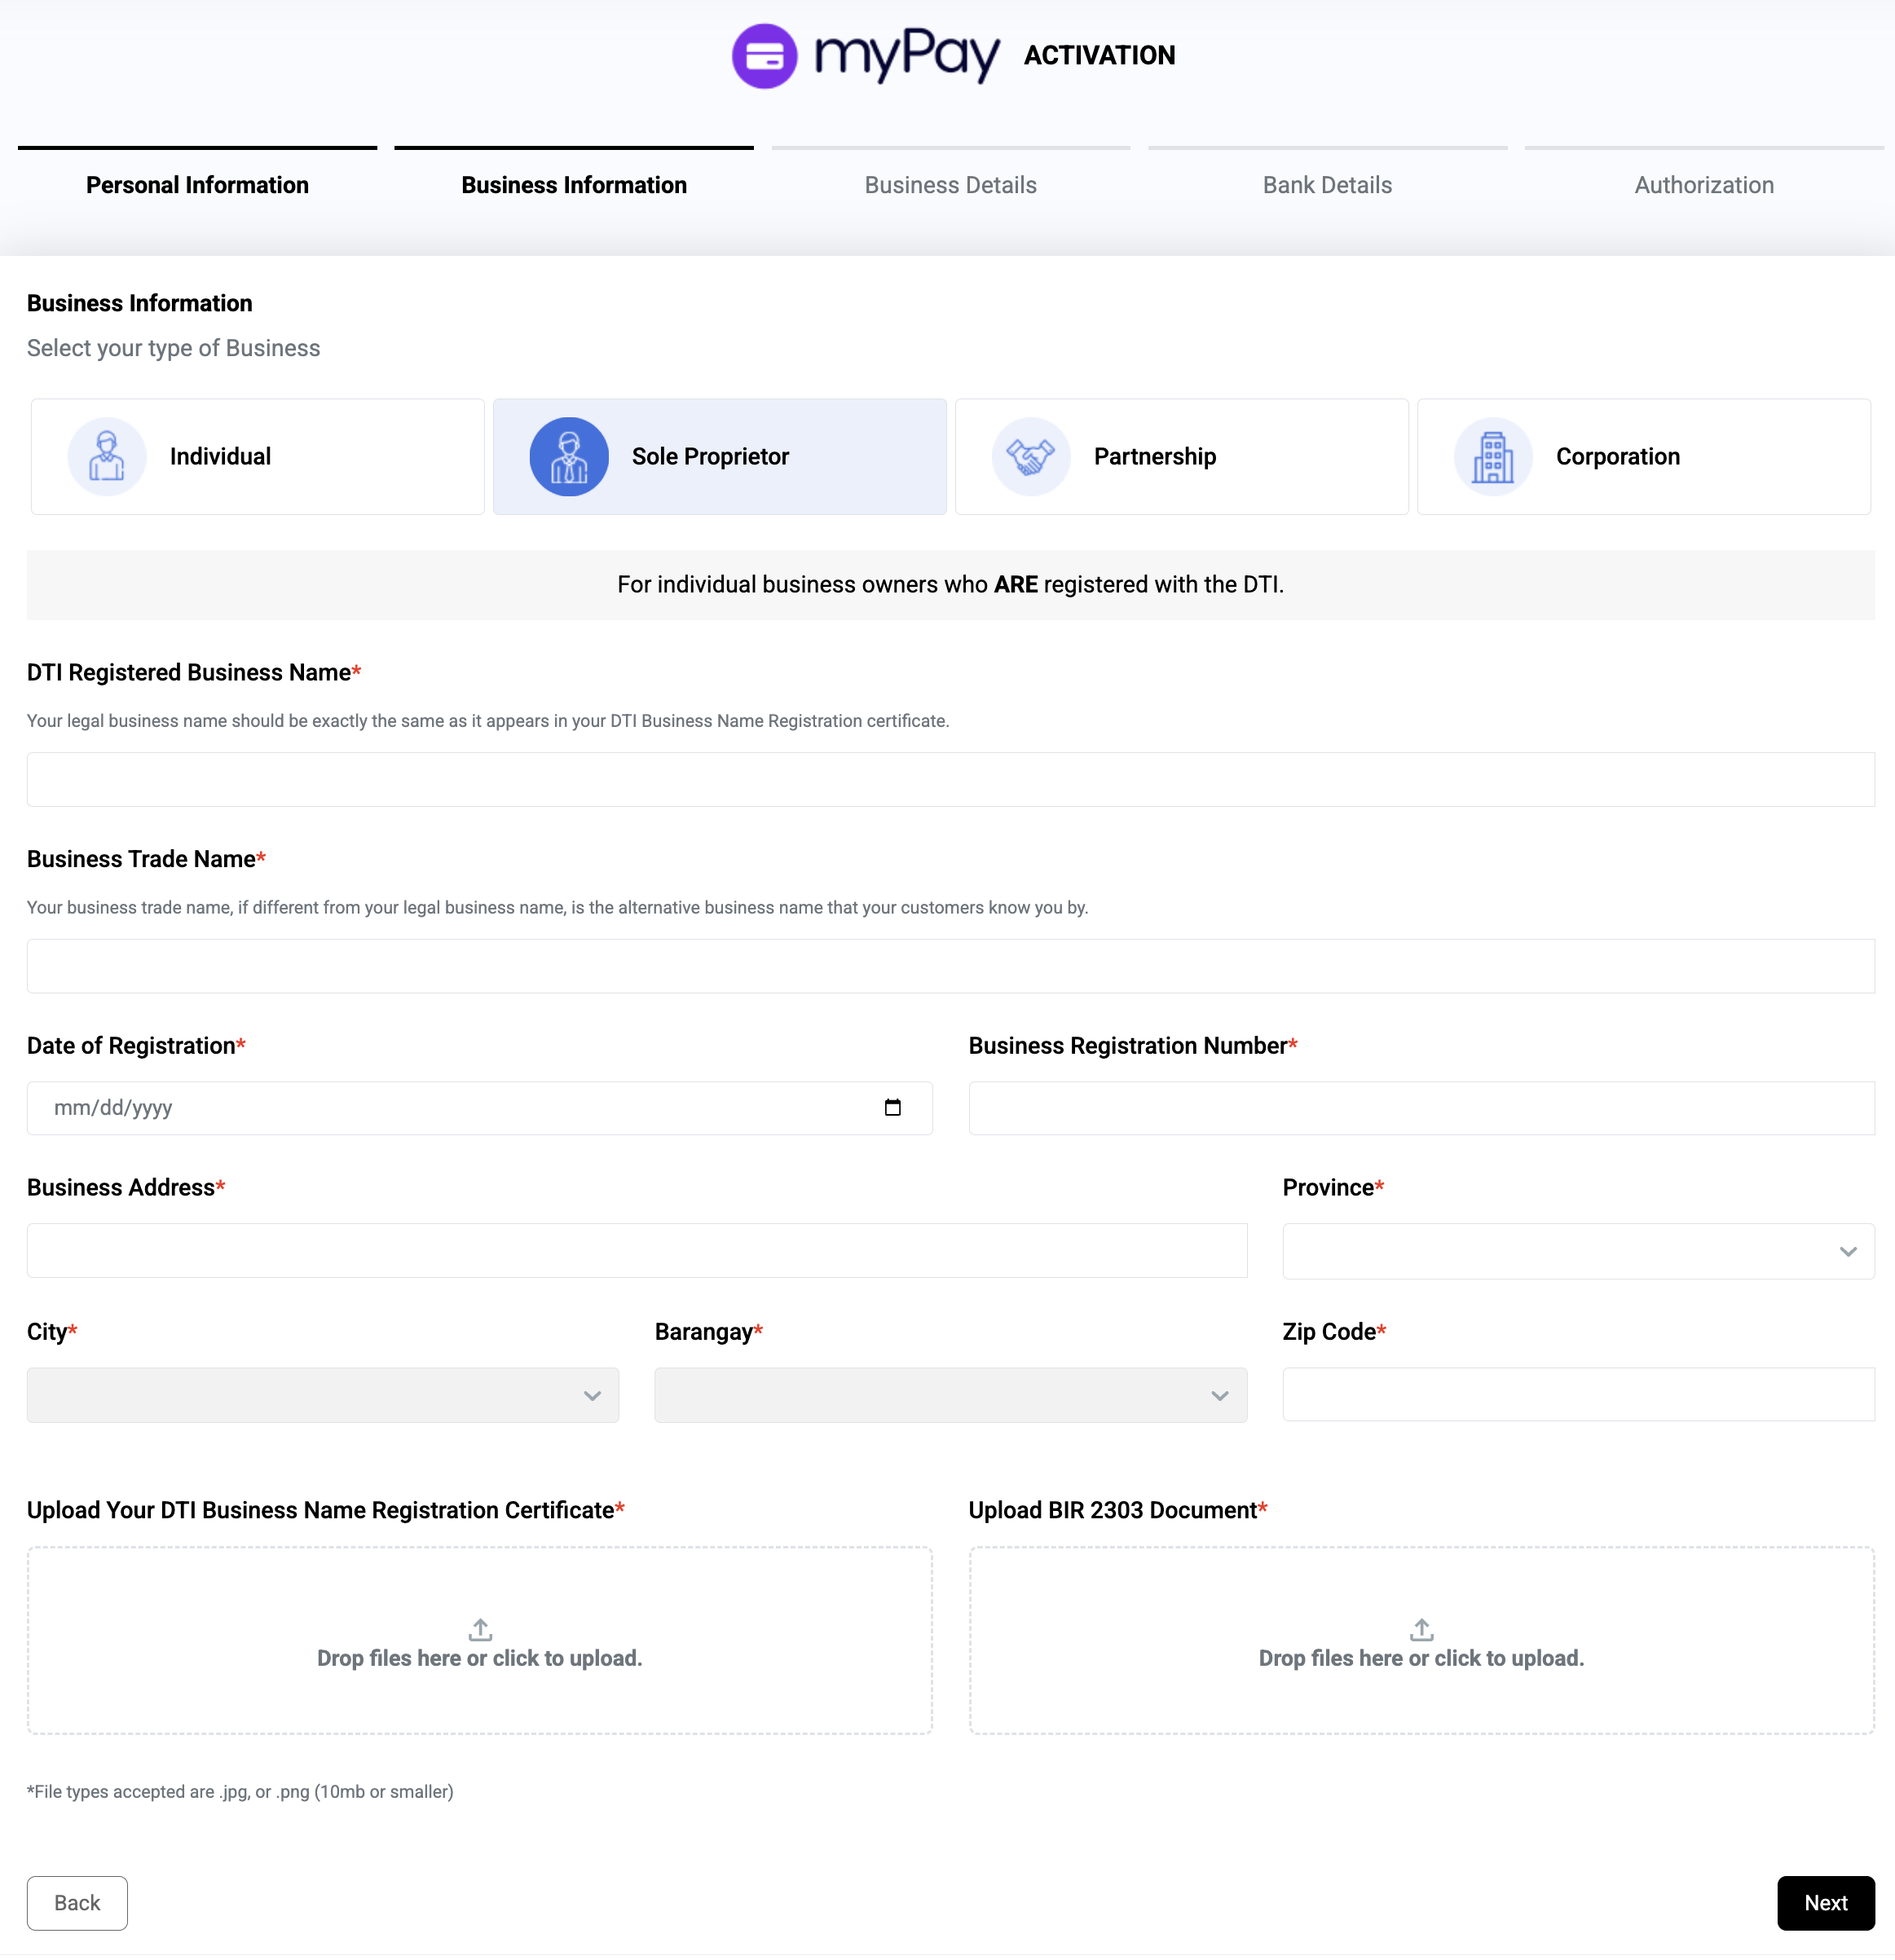
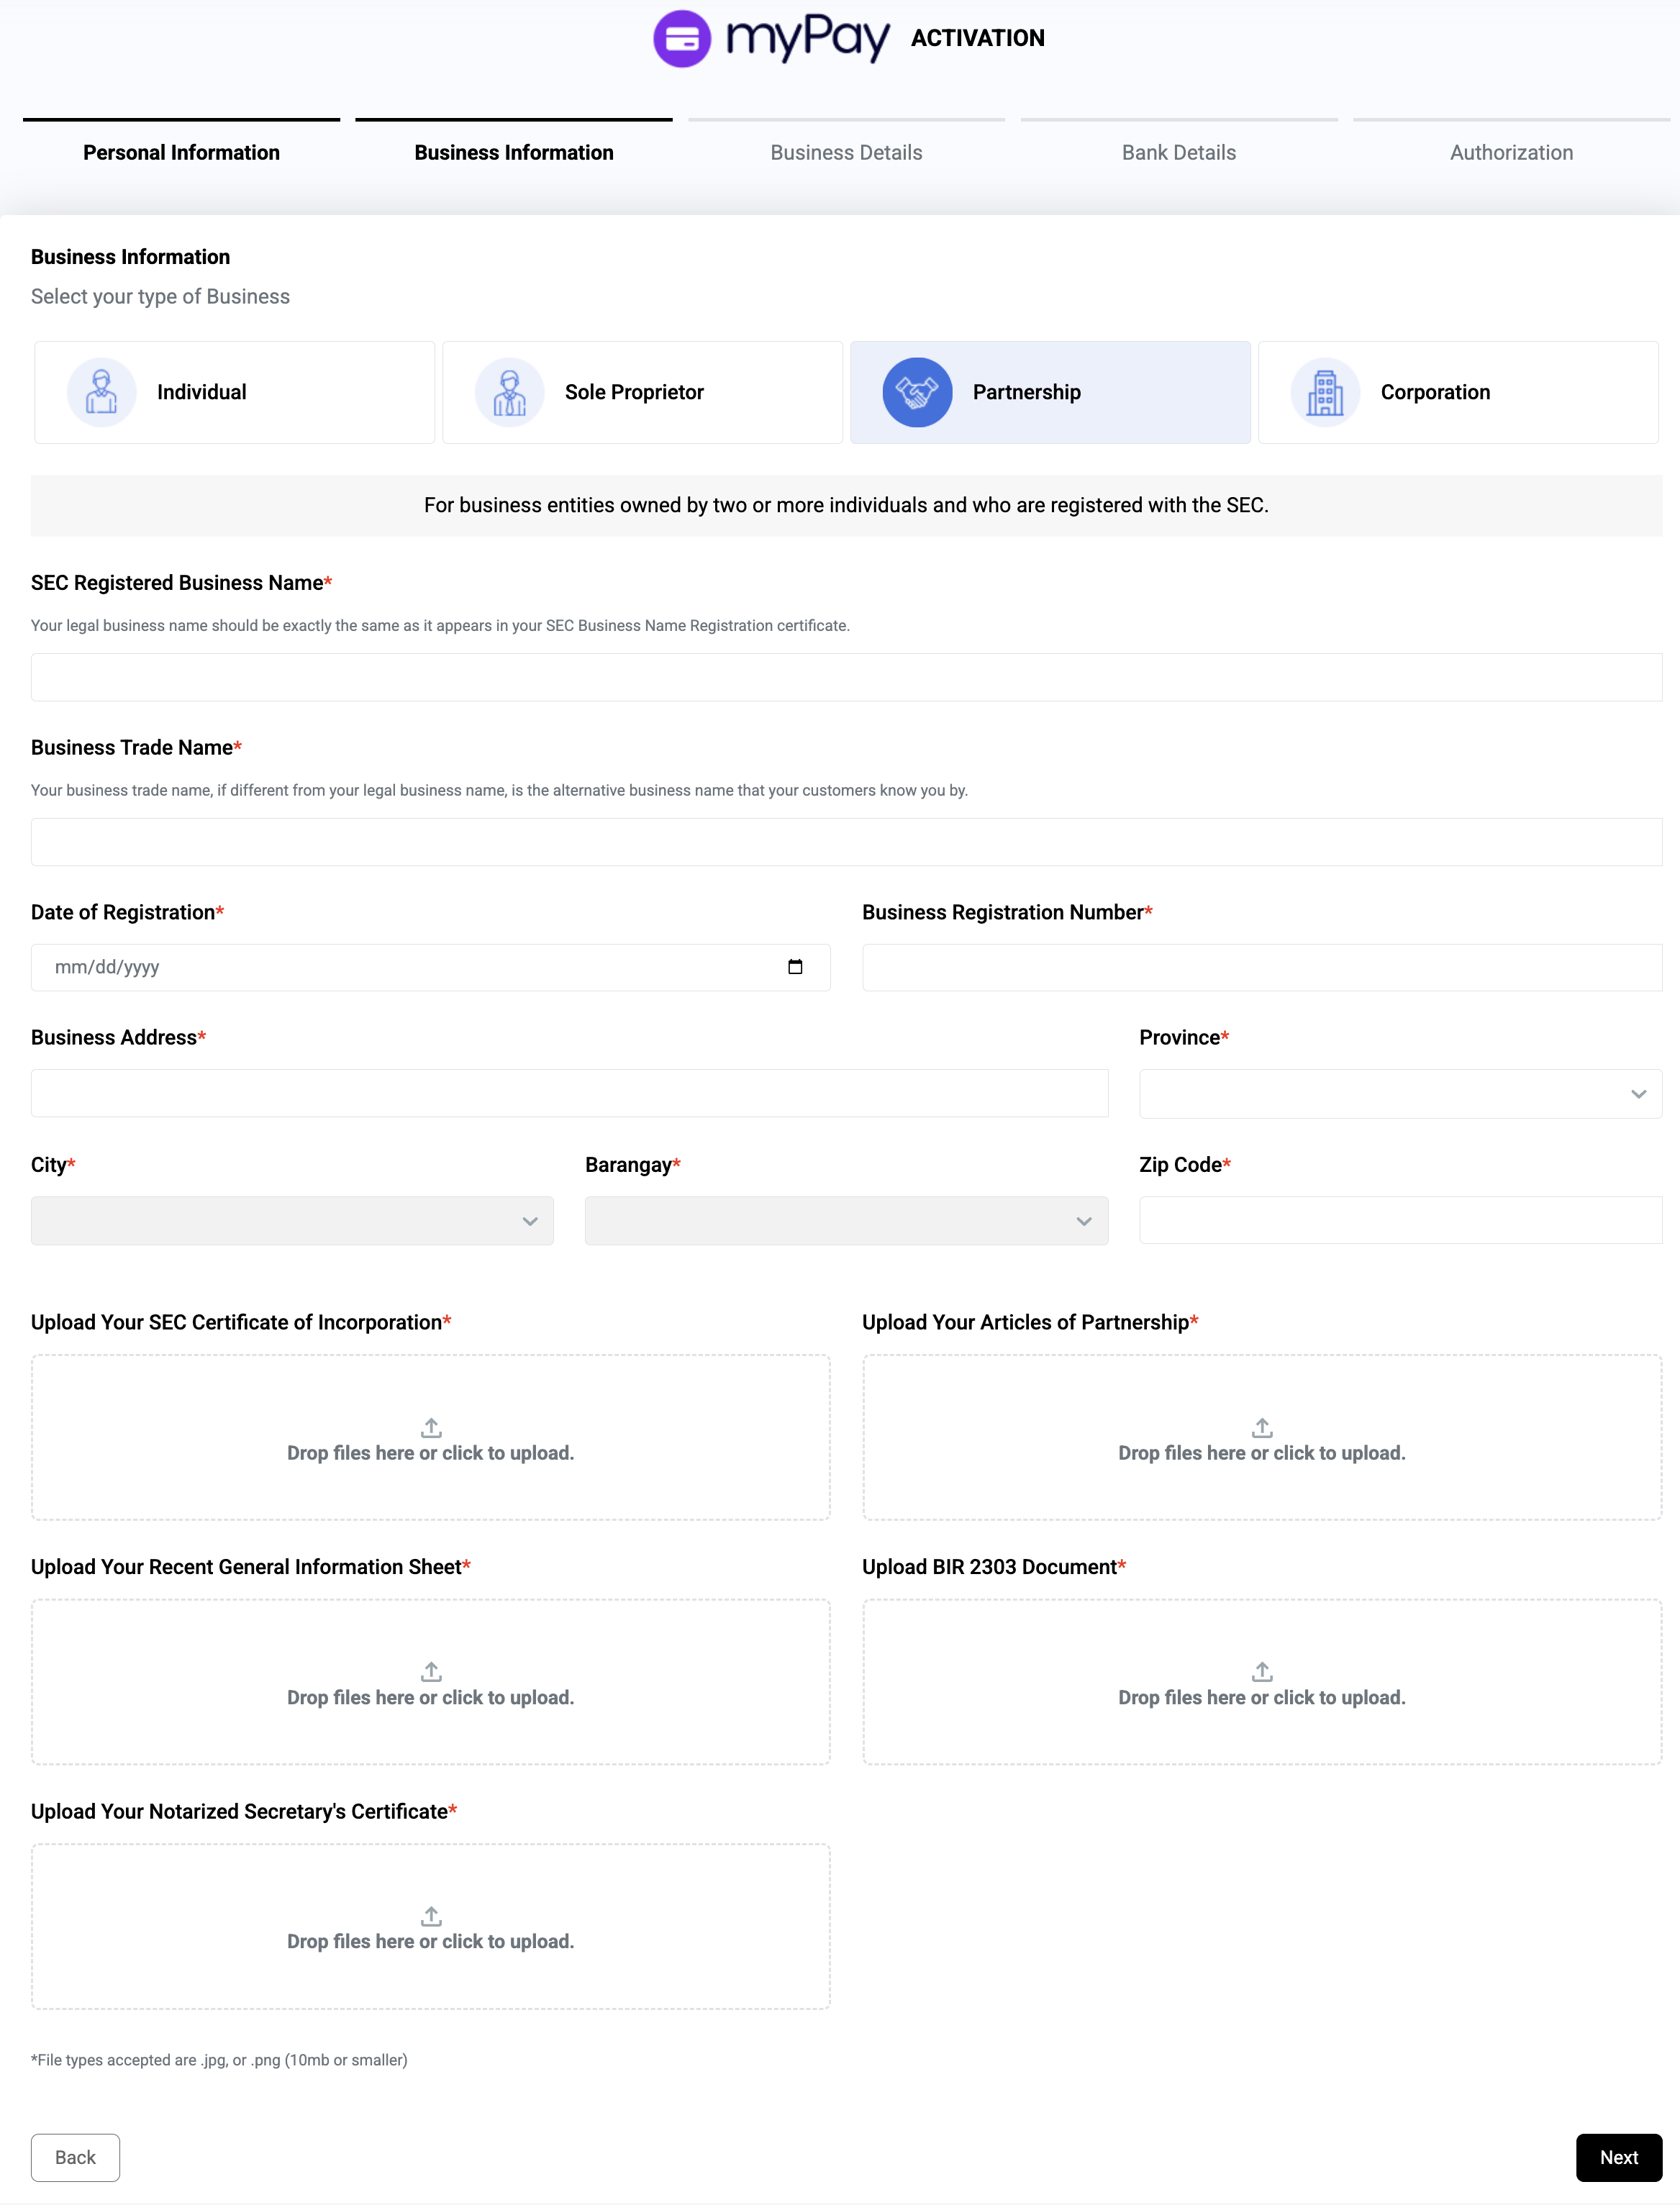
Note: Please select what type of Business you have (e.g., Individual, Sole Proprietor, Partnership, Corporation) as the requirement will depend upon the type of Business you will have.
Sole Proprietor Application
Partnership Application
Corporation Application

5. Submit your Business Details.
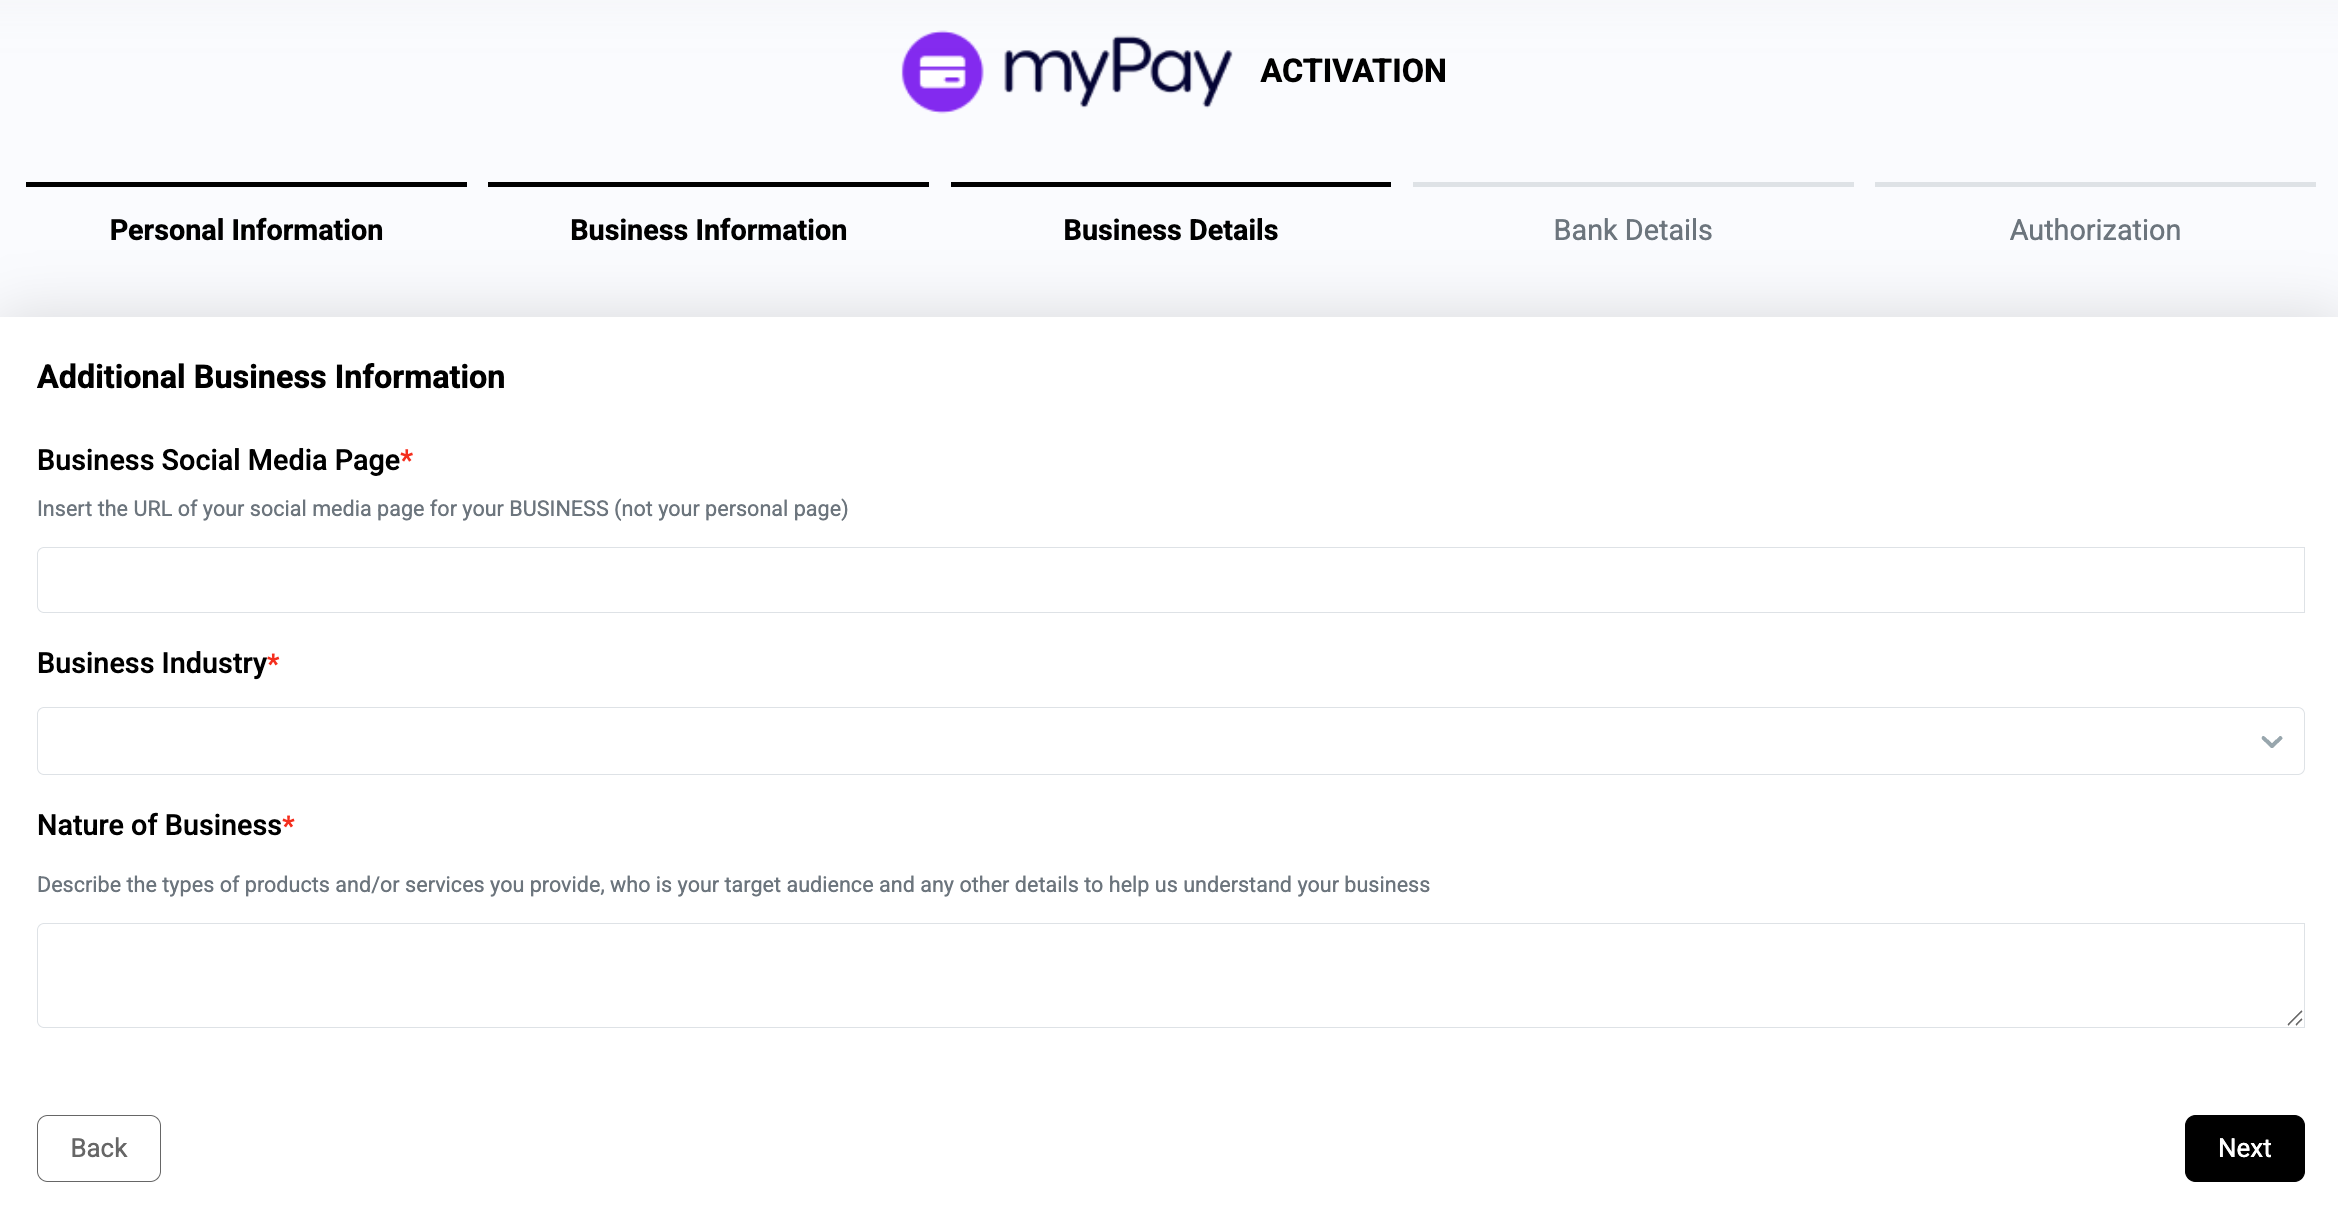
Note: Please ensure that the required field has been answered
6. Submit your Banking Details
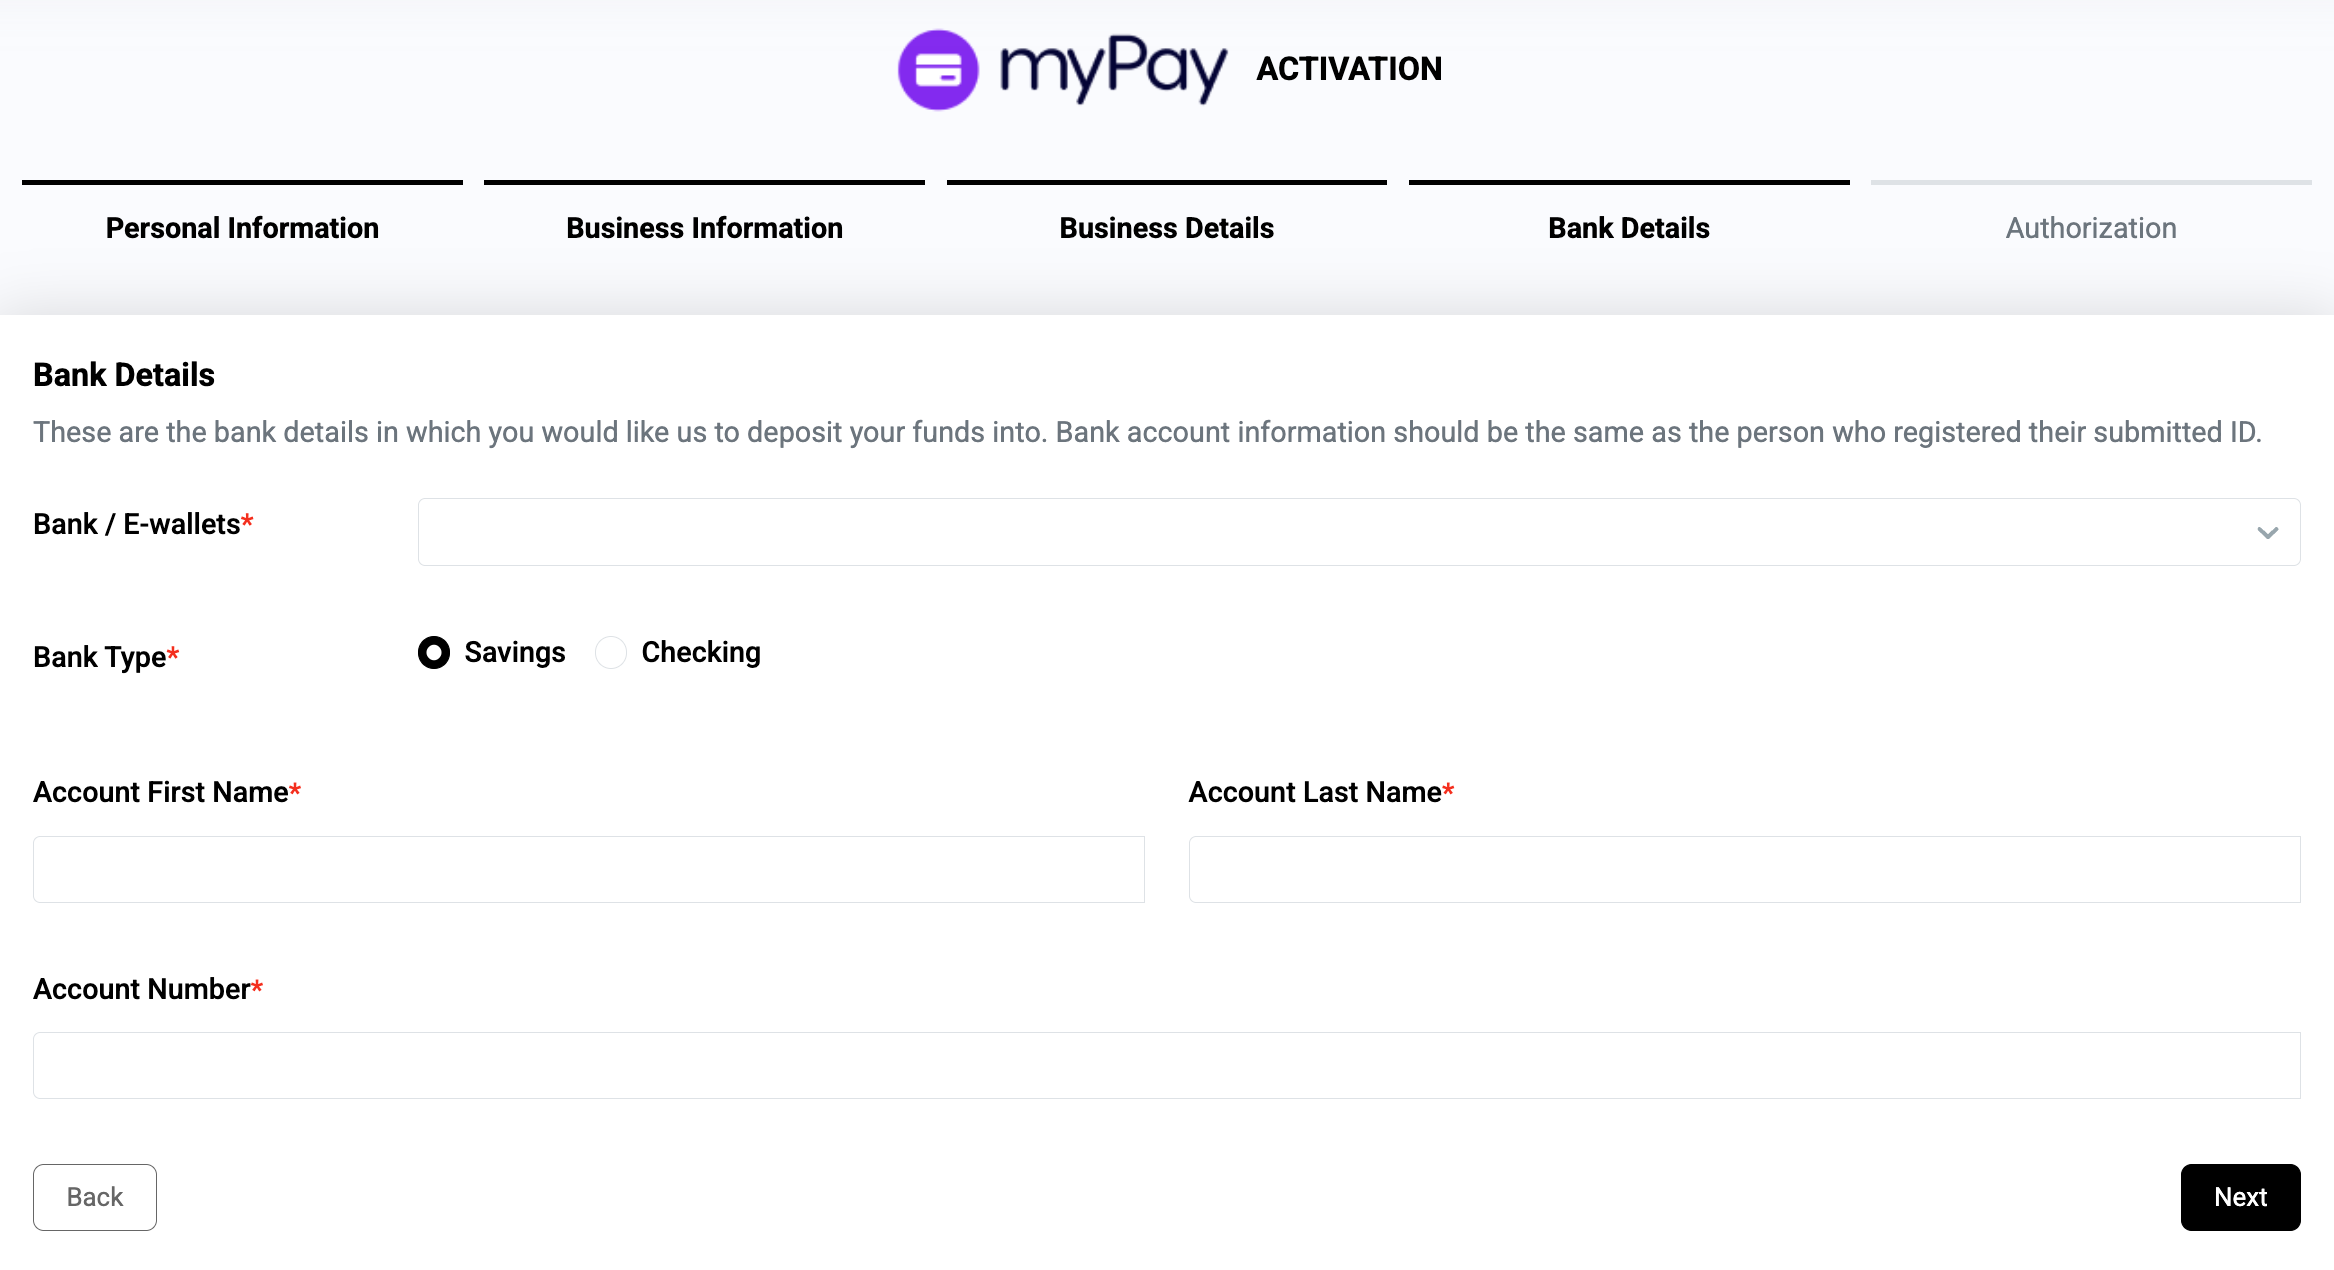
Note: Providing banking details is important for Disbursement Process.
7. Statement of Authorization
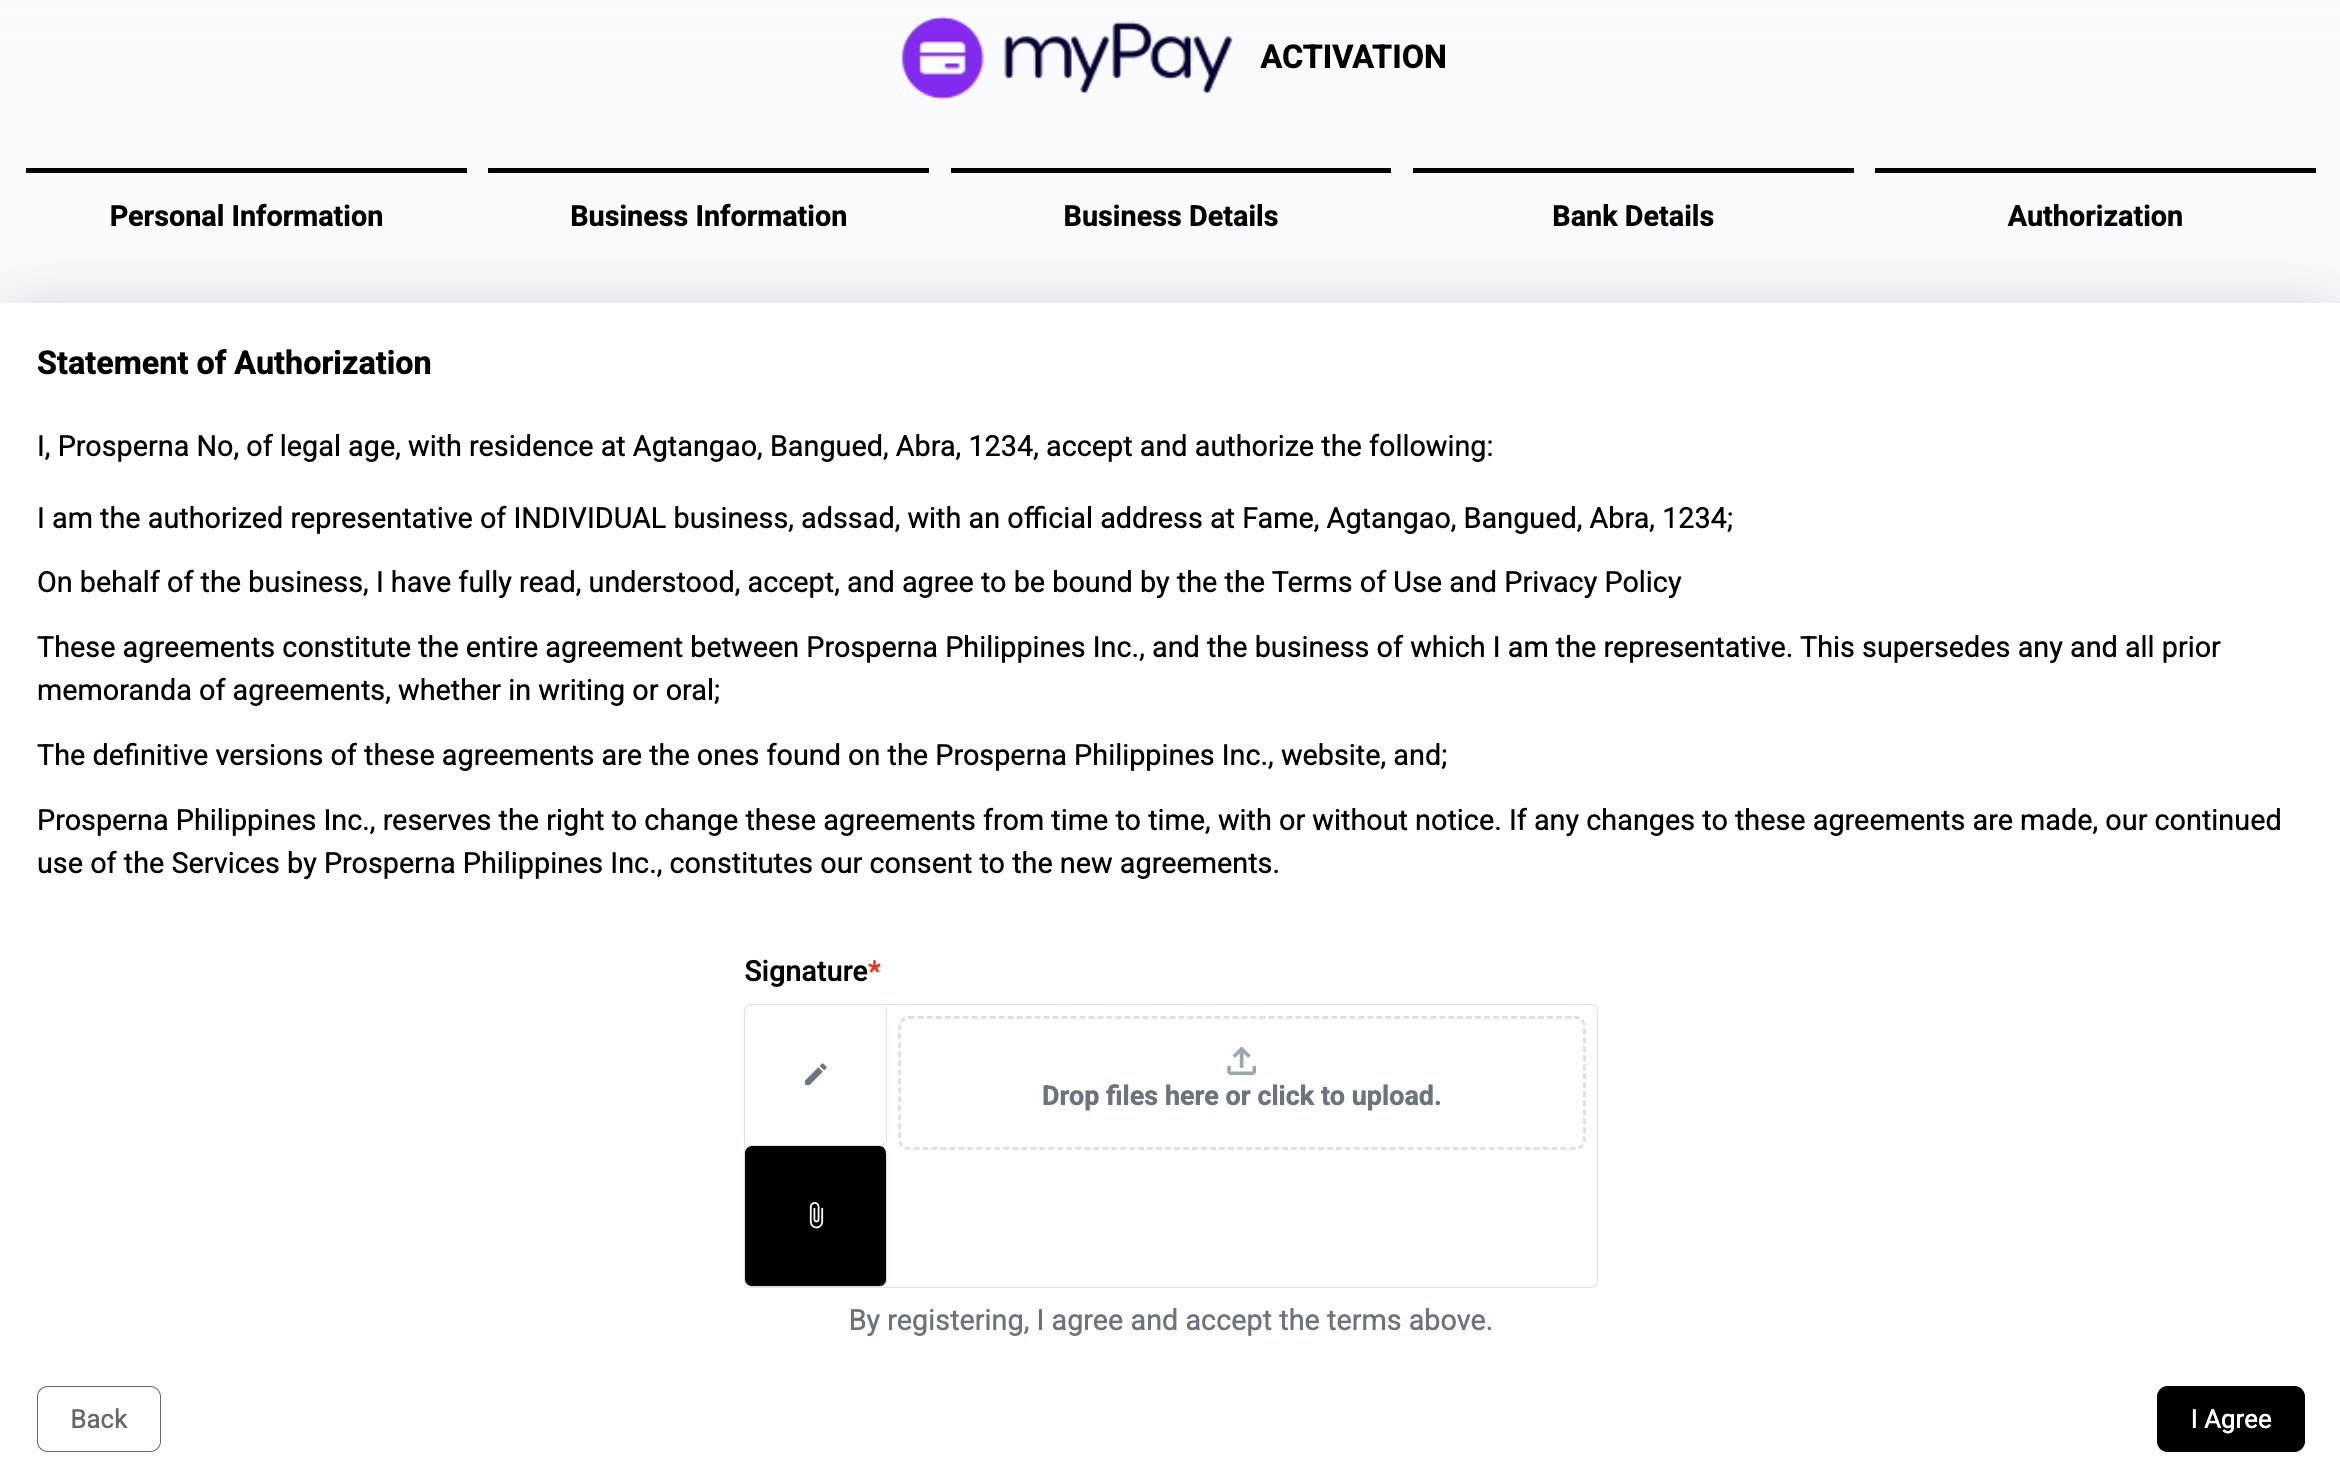
Note: Please attached your signature
You will receive a notification when your account is verified. The verification process timeline is within 1 - 3 business days. An email notification will be sent to you.
This is an activated myPay.

Set Up Shipping
What’s an online store without logistics and fulfillment - Prosperna Shipping gives you the choice as to how your products will be delivered to customers.
Each of these choices will have its corresponding fees and serviceable areas.
Note: To access standard and same-day delivery you are required to have an activated myPay account.
1. Shortcut: Follow the Setup Guide
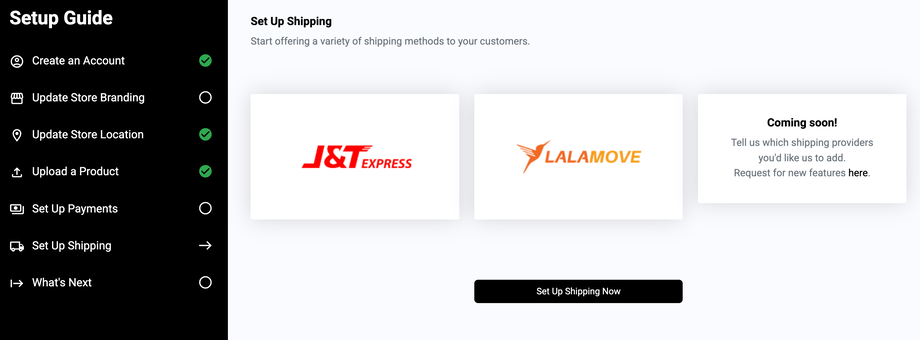
2. Or, Go to Settings, Select Shipping.
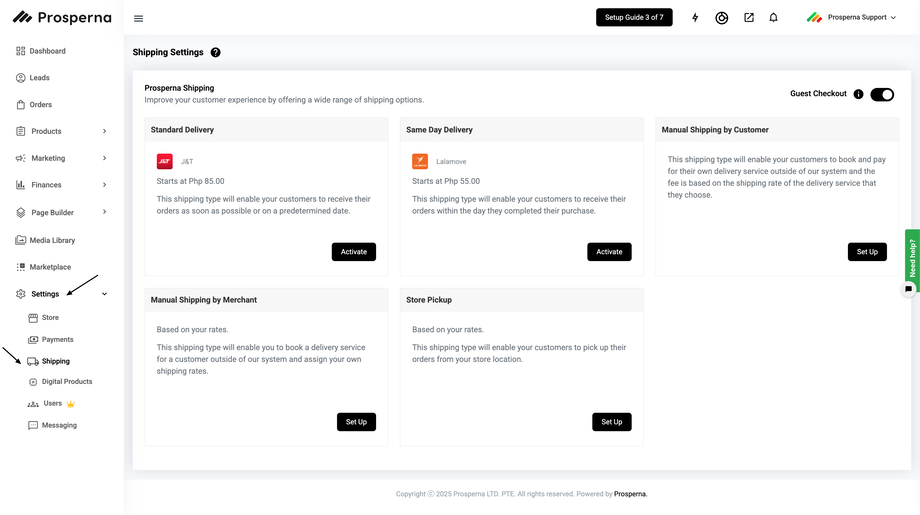
3. Set up Applicable Shipping Method
Standard Delivery (J&T Express)
Starts at ₱85.00.
Customers receive orders as soon as possible or on a predetermined date.
Click Activate to enable this delivery method.
Same Day Delivery (Lalamove)
Starts at ₱55.00.
Customers receive orders within the same day after completing their purchase.
Click Activate to enable this delivery method.
Manual Shipping by Customer
Lets customers book and pay for their own delivery service (outside Prosperna).
Shipping fee is based on the rate of the service they choose.
Click Set Up to enable and configure it.
Manual Shipping by Merchant
Based on your own custom rates.
You (the merchant) manually book delivery for the customer outside Prosperna and assign your own shipping fees.
Click Set Up to configure.
Store Pickup
This shipping type will enable your customers to pick up their orders from your store location.
The available payment options may vary depending on the selected shipping method. You can choose your preferred payment type by selecting it, and this will be shown during checkout.
For example:
Some courier-based deliveries (e.g., J&T, Lalamove) may support Cash on Delivery (COD).
Other methods, such as Manual Shipping or Store Pickup, may allow bank transfer, GCash, or other online payments.
Make sure to nominate the appropriate payment type based on your delivery preference.
7. What's next?
Read more Knowledge Base articles on the features you can activate by clicking on the link above for more information.
You can also follow the suggestions on the Setup Guide such as:
Upload more products
Add Sales Channels
Subscription Plans
Need more help?
For more information and assistance, please send an email to support@prosperna.com.

